 When I was a kid, I remember getting a DIY teddy bear for a birthday gift. A package with pre-cut fabric pieces, thread, doll eyes, and stuffing. For those of you who don't know me yet, I am a craft addict. I love to make things. It was a fantastic gift and I had a blast making it. For this next pattern I decided to do a little twist on the classic teddy bear, inspired by that gift. What you will need
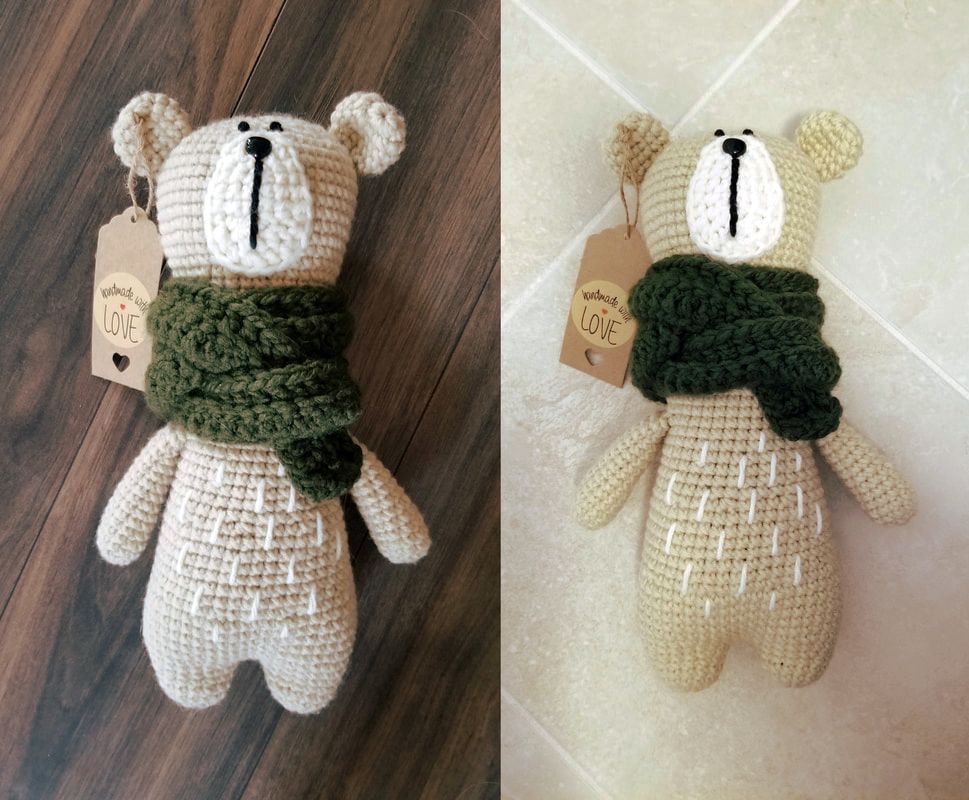
NotesUnless otherwise specified, all parts will be worked in continuous rounds. It is important to use your stitch markers at the end of each round so you don't lose your place! I always start all my rounds with a magic ring. You can watch a video about how to do that here. If you do not want to use a magic ring, you can chain one, then crochet the specified amount of stitches into that chain. I highly recommend using a magic ring because you can tighten the ring after you have done a few rows and it eliminates any gaps in your work. Make sure to always be working with the outside of the shape facing you while you crochet around. This side is the "right" side. In my amigurumi, I usually like to use the cross stitch single crochet. This is definitely not required but I find it gives a nicer look to the finished product. You can watch a video on how to do this stitch here. Here is a comparison of the two different stitches:
AbbreviationsSS: Slip Stitch, CH: Chain, SC: Single Crochet, HDC: Half Double Crochet, Inc: SC Increase (2 SC in same stitch), Dec: SC Decrease (if you do not know how to do this, watch this), BLO: Back Loop Only, [ ]: When you see this, you will be repeating the pattern inside the brackets, ( ): Total number of stitches for that round PATTERNBody (with legs and head)Start with the legs (Make 2): 1: Start 8 SC in a magic ring (8) 2: Inc x8 (16) 3-5: SC in all (16) 6: [3SC, Inc] x4 (20) Fasten off first leg with a slip stitch. Do not fasten off the second leg, you will continue crocheting to attach the legs together. Body: Continue from end of second leg: 1: 10SC, now pick up the other leg and continue to SC 20 stitches all the way around that leg. Now starting in the 11th stitch of the first leg, finish the last 10SC until you finish the round (40) 2: SC in all (40) 3: [4SC, Inc] x8 (48) 4-7: SC in all (48) 8: [4SC, Dec] x8 (40) 9-14: SC in all (40) 15: [3SC, Dec] x8 (32) 16-22: SC in all (32) At this point, the body should be starting to get long. Start filling the legs and body with fiber fill at this point so it isn't so hard to stuff later.
Shameless Plug...I also make custom dog tags on Etsy. If you are in the market for some, please check out my shop PersonalizePenguin!
Leave a stitch marker in this row because this is where the arms are going to be sewn on. It might seem low, but don't worry, it will all come together later. 23-36: SC in all (32) 37: [3SC, Inc] x7, 4SC (39) 38-40: SC in all (39) 41: [3SC, Inc] x9, 3SC (48) 42-48: SC in all (48) 49: [3SC, Dec] x9, 3SC (39) 50: [Dec, 2SC] x9, 3SC (30) 51: [2SC, Dec] x7, 2SC (23) Stuff the remaining half of the body with fiber fill now. Don't worry about the eyes, because they will be stitched in with yarn later instead of using safety eyes. 52: [Dec, SC] x7, 2SC (16) 53: Dec x4, then weave through front loop of each remaining stitch and pull closed. Fasten off and weave in the end. ArmsMake 2: 1: Start 8 SC in a magic ring (8) 2: Inc x8 (16) 3-4: SC in all (16) 5: Dec, 14SC (15) 6: SC in all (15) 7: Dec, 13SC (14) 8-15: SC in all (14) Stuff with fiber fill. Slip stitch the arm closed then fasten off. Leave a long tail, then sew onto the body on either side on row 22 (as marked above). EarsMake 2: 1: Start 8 SC in a magic ring (8) 2: Inc x8 (16) 3-4: SC in all (16) 5: [SC, Dec] x5, SC (11) 6: Dec x4, then slip stitch the ear closed and fasten off (you do not need to stuff the ears with fiber fill). Leave a long tail for sewing, then sew on the ears wherever looks the cutest! SnoutUsing the white (aran) yarn: 1: Make a slip knot and Ch5 2: Starting in the 2nd chain 3SC, SC 3 into the same stitch, 2SC, Inc (10), then join with a SS 3: Ch1, then into the same stitch that you joined in the last round: Inc, SC, HDC, 2HDC x4, HDC, SC, Inc x2 (18), then join with a SS 4: Ch1, then into the same stitch that you joined in the last round: Inc, 3SC, HDC, [HDC 2 into the same stitch, HDC] x4, 3SC, Inc, then join with a SS (24) Fasten off and leave a long tail for sewing. Put this aside until the nose and mouth are attached. Eyes, Nose, Mouth, HairMouth: Take the snout (which should look like and egg shape). and turn it so the small part of the egg is facing up. Starting in the middle, from the second stitch down, sew a "line" down the snout for 8 stitches (or 2 stitches from the bottom). Nose: Attach the safety nose now, to the top of the mouth line (1 stitch from the top of the "egg" shape). Attach the snout to your bear head now. See image below for placement guidelines. You may want to use pins to keep the snout in place while you sew it to the head. 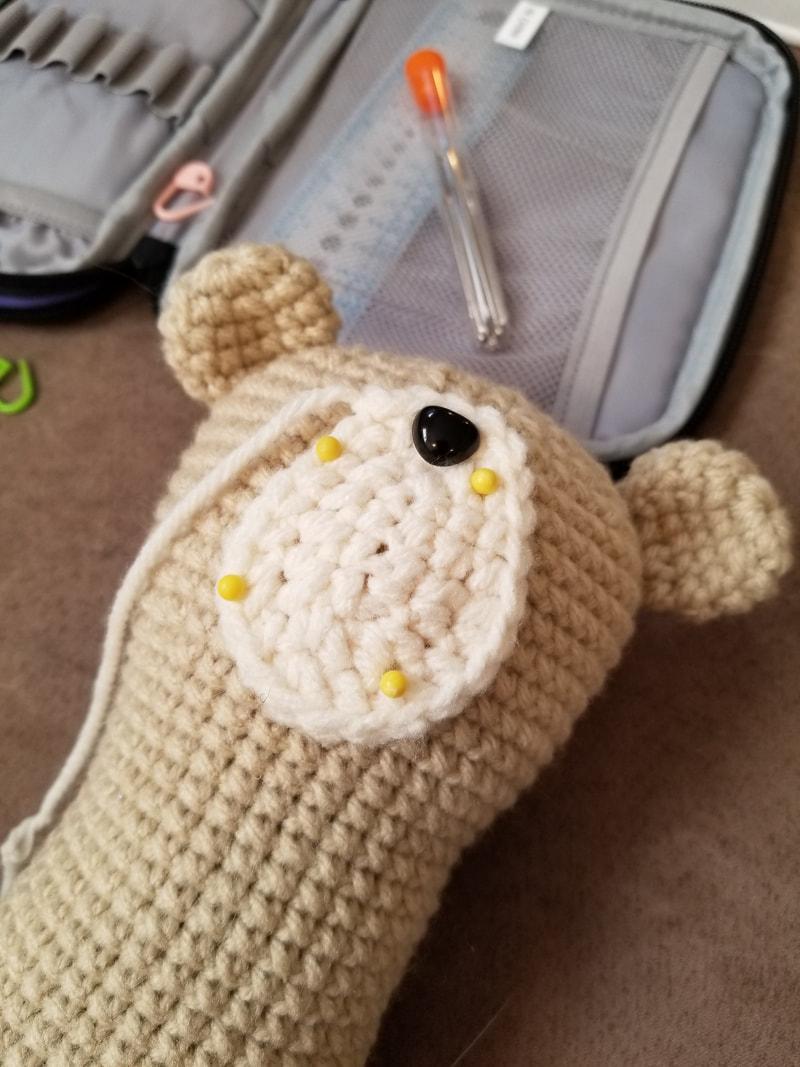 Placing the Snout on the bear. NOTE: I didnt stitch the mouth on before the nose, and it was a huge mistake! It is much easier to stitch the mouth on, then the nose, then sew it on the head. Eyes: Make 2: 1: Cut a piece of black yarn about 6 inches long. 2: Tie a knot 3 times around (see video here for instructions). 3: Sew eyes right above the snout, with 2 stitches between. Belly hair (optional): 1: Cut the yarn to about 6 inches and sew through the two points of the hair you want to add. 2: Now you can tie the two ends of the yarn together. I just do a regular knot you would do when tying your shoes, twice. Make sure the knot is tight 3: Now you can trim the excess pieces of yarn (leave about a cm) and rotate the yarn so the knot goes inside the body. Repeat for any amount of hair pieces you want to add! I just put them randomly all over the belly. ScarfUsing the thick yarn (I used Charisma in "Forest") and same hook (4mm): 1: Ch 91 2: Starting from the 3rd chain from hook, DC in all chains 3: Ch 2, DC in all stitches in the BLO Fasten off and weave in ends. Wrap the scarf around your bears neck making sure it is really hugging his chin! You can just tuck in the end to make it stay. 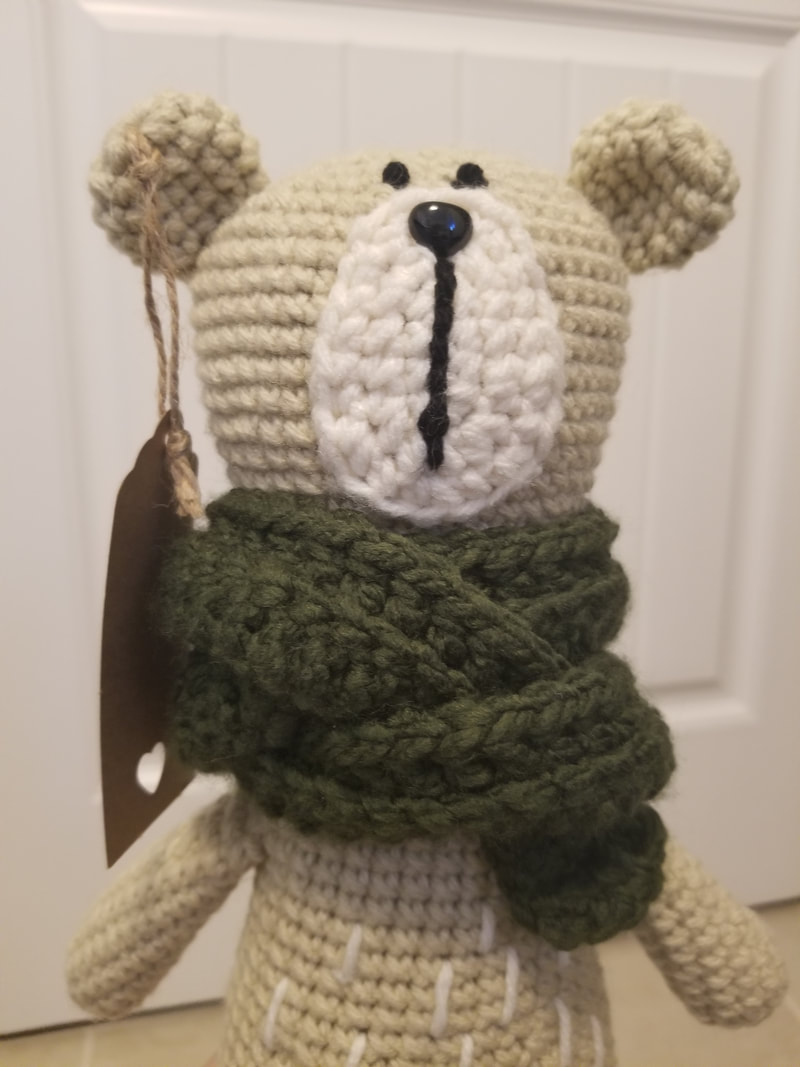 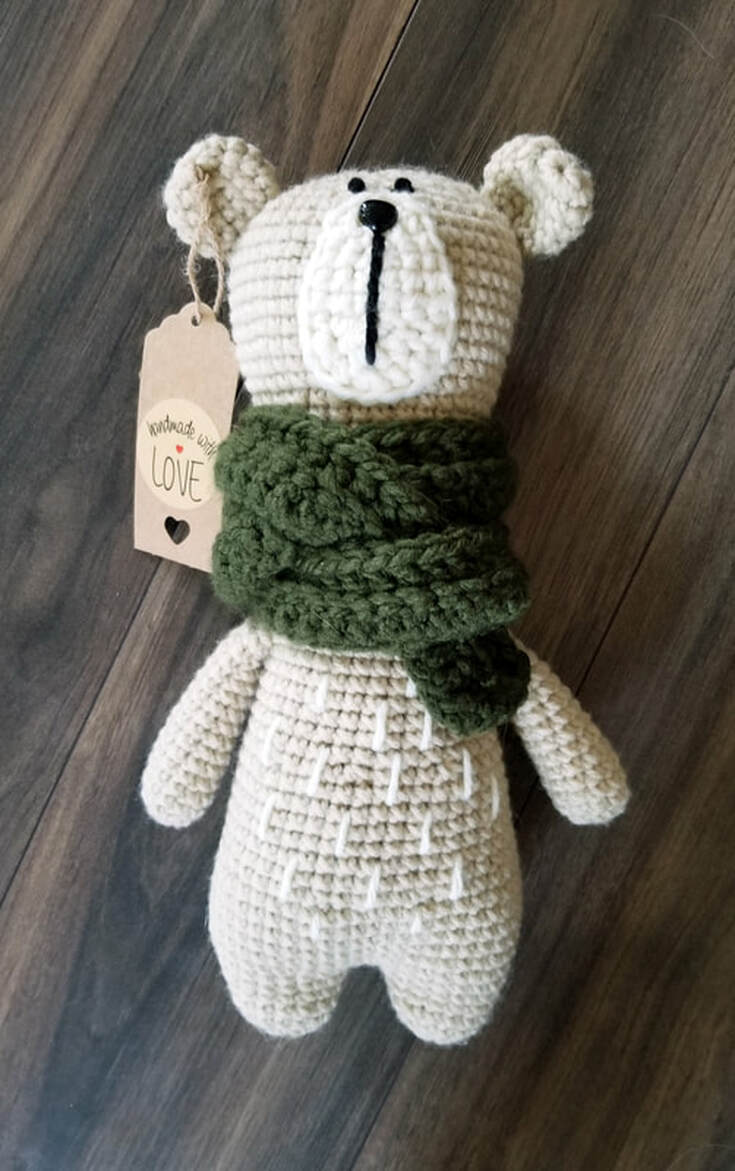 I would love to hear about your experience with this pattern! Feel free to post any comments or questions below!! :) Love, Nikki
82 Comments
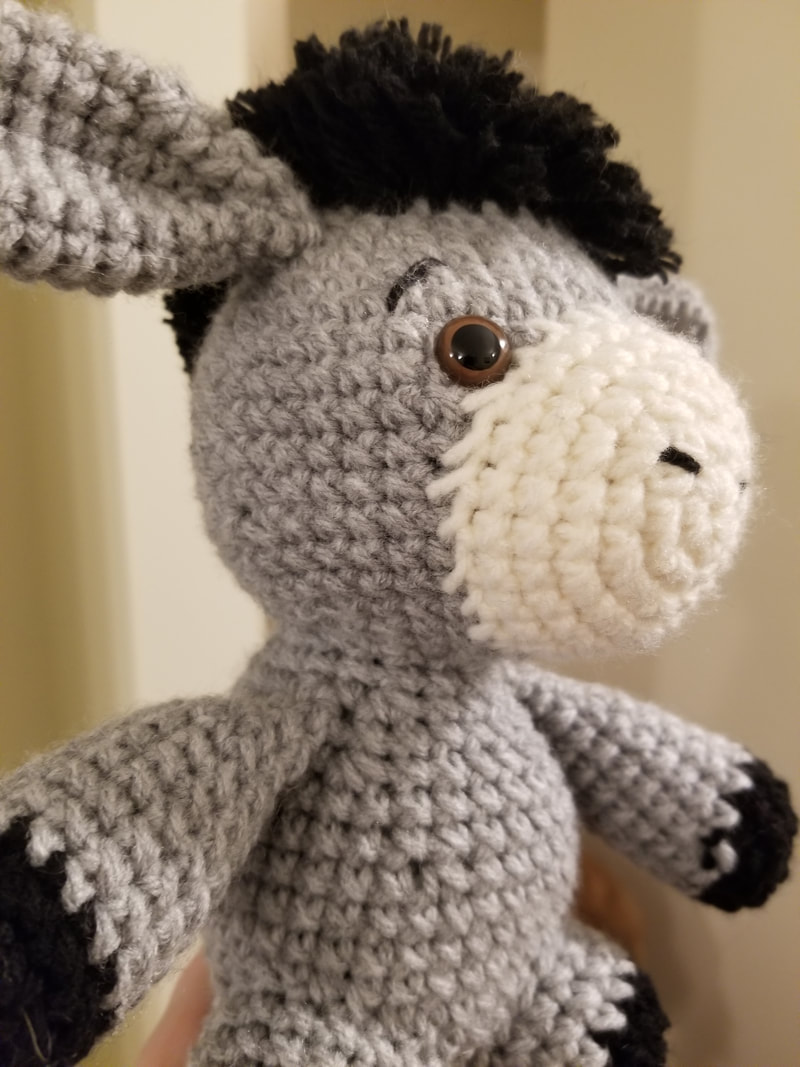
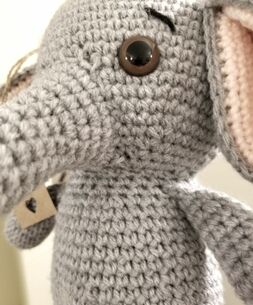
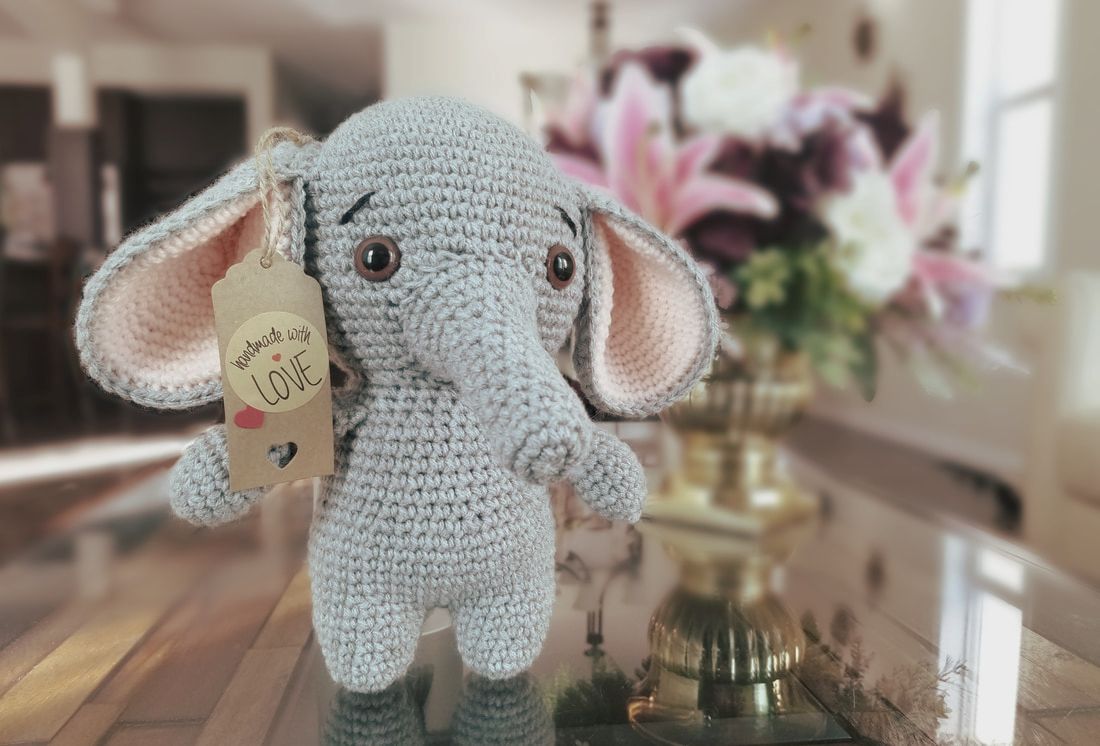 Ok so I remember endlessly scrolling through Pinterest (like one does), and I saw the cutest amigurumi crocheted elephant ever. I needed to make it. So I started searching for a pattern to buy but I couldn't find one anywhere! Instead of searching for a pattern any longer, I decided I would go off the picture to recreate it... and it turned out amazing!! Because I love it so much, I decided I would create a pattern so others could enjoy this wonderful little project. You will find the free pattern below. Enjoy :) What you will need
NotesUnless otherwise specified, all parts will be worked in continuous rounds. It is important to use your stitch markers at the end of each round so you don't lose your place! I always start all my rounds with a magic ring. You can watch a video about how to do that here. If you do not want to use a magic ring, you can chain one, then crochet the specified amount of stitches into that chain. I highly recommend using a magic ring because you can tighten the ring after you have done a few rows and it eliminates any gaps in your work. Make sure to always be working with the outside of the shape facing you while you crochet around. This side is the "right" side. In my amigurumi, I usually like to use the cross stitch single crochet. This is definitely not required but I find it gives a nicer look to the finished product. You can watch a video on how to do this stitch here. Here is a comparison of the two different stitches:
AbbreviationsSC: Single Crochet, Inc: SC Increase (2 SC in same stitch), Dec: SC Decrease (if you do not know how to do this, watch this), [ ]: When you see this, you will be repeating the pattern inside the brackets, ( ): Total number of stitches for that round PATTERNHeadUsing the light grey yarn: 1: Start 6 SC in a magic ring 2: Inc x6 (12) 3: [SC, Inc] x6 (18) 4: [2SC, Inc] x6 (24) 5: [3SC, Inc] x6 (30) 6: [4SC, Inc] x6 (36) 7: [5SC, Inc] x6 (42) 8: [6SC, Inc] x6 (48) 9: [7SC, Inc] x6 (54) 10: SC in all (54) 11: [8CS, Inc] x6 (60) 12-21: SC in all (60) Insert safety eyes here between rows 18 and 19, 13 stitches apart from each other. 22: [8SC, Dec] x6 (54) 23: [7SC, Dec] x6 (48) 24: [6SC, Dec] x6 (42) 25: [5SC, Dec] x6 (36) 26: [4SC, Dec] x6 (30) 27: [3SC, Dec] x6 (24) 28: [2SC, Dec] x6 (18) Now, stuff the head with filling to your desired firmness. I recommend stuffing amigurumi fairly firm so they hold their shape better. 29: [SC, Dec] x6 (12) 30: Dec x6 (6) Now finish the head by sewing through the front loops of every stitch and pulling it tight. At this point I like to tie it in a tight knot because it is more secure and will be hidden when you attach the body. TrunkUsing the light grey yarn: 1: Start 6 SC in a magic ring (6) 2: Inc x6 (12) 3: [3SC, Inc] x3 (15) 4-12: SC in all (15) 13: [4SC, Inc] x3 (18) 14: [8SC, Inc] x2 (20) 15: [9SC, Inc] x2 (22) 16: [10SC, Inc] x2 (24) Fasten off with a slip stitch, and leave a long tail for sewing. Stuff the trunk with fiber fill now and sew the trunk between the eyes (obviously :P) so the very top of the trunk is vertically in the middle of the eyes (see diagram below). 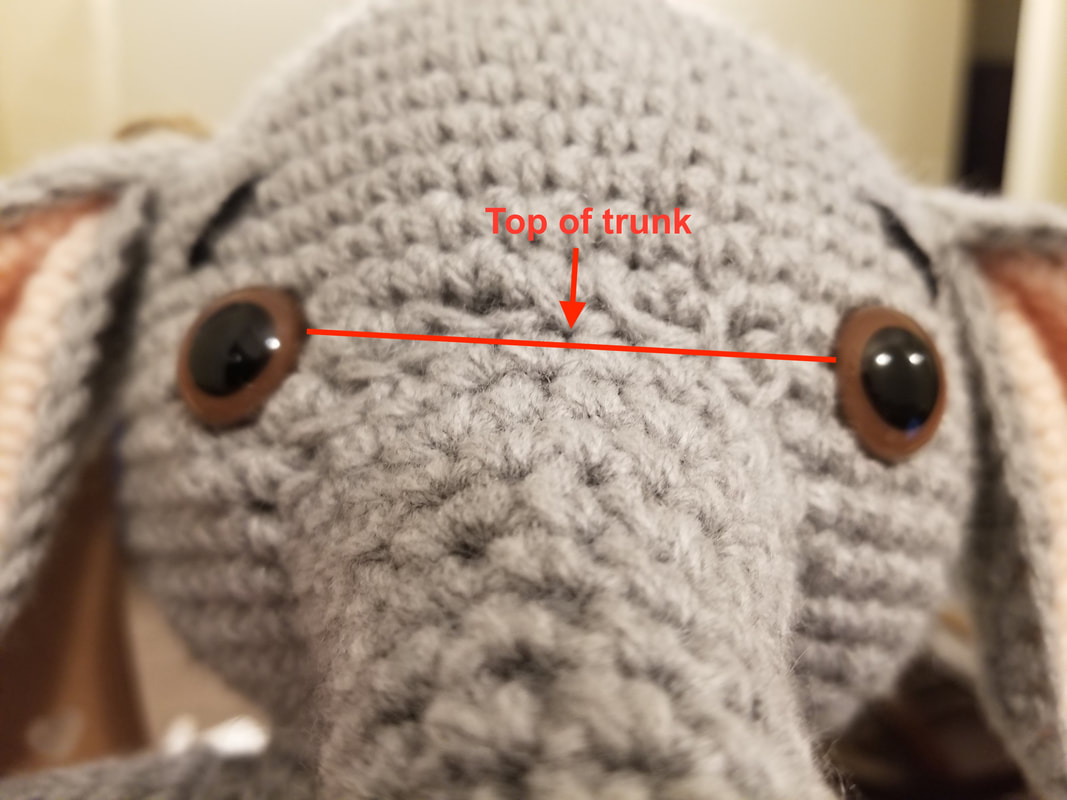 Shameless Plug...I also make custom dog tags on Etsy. If you are in the market for some, please check out my shop PersonalizePenguin!
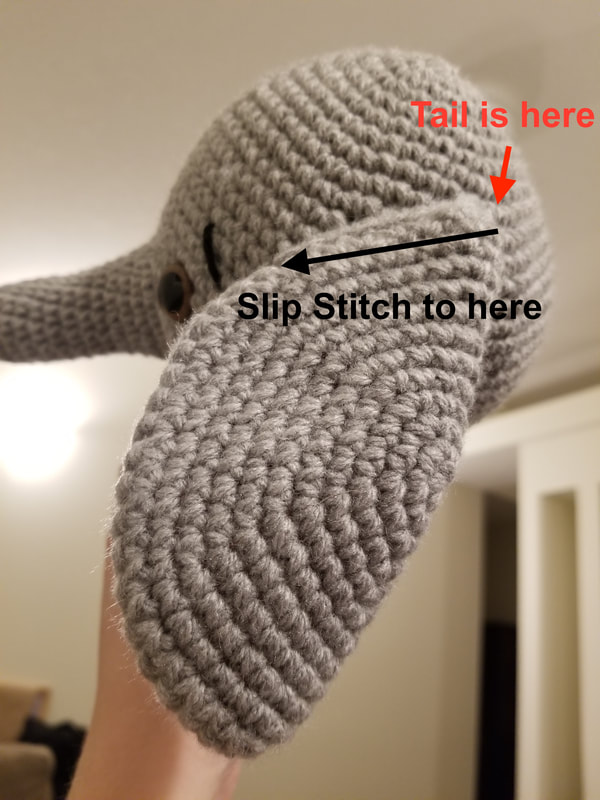
EarsMake 2 using light grey and 2 using light pink (total of 4) 1: Start 6 SC in a magic ring 2: Increase around x6 (12) 3: [Inc, SC] x 6 (18) 4: SC, [Inc, 2SC] x5, Inc, SC (24) 5: [Inc, 3SC] x6 (30) 6: 3SC, [Inc, 4SC] x5, Inc, SC (36) 7: [Inc, 5SC] x6 (42) 8: 4SC, [Inc, 6SC] x5, Inc, 2SC (48) 9: [Inc, 7SC] x6 (54) 10: 5SC, [Inc, 8SC] x5, Inc, 3SC (60) 11: [Inc, 9SC] x6 (66) 12: 3SC, [Inc, 10SC] x5, Inc, 7SC (72) For the grey circles: fasten off and leave a very long tail (approx. 4 ft) to sew the circles together. For the pink circles: fasten off and trim the yarn to a couple inches. You can tie a knot and leave the yarn hanging in this case as well because it can be tucked in between the ear circles when you sew them together. Now you are going to sew the light pink circle to the grey circle by using single crochets:
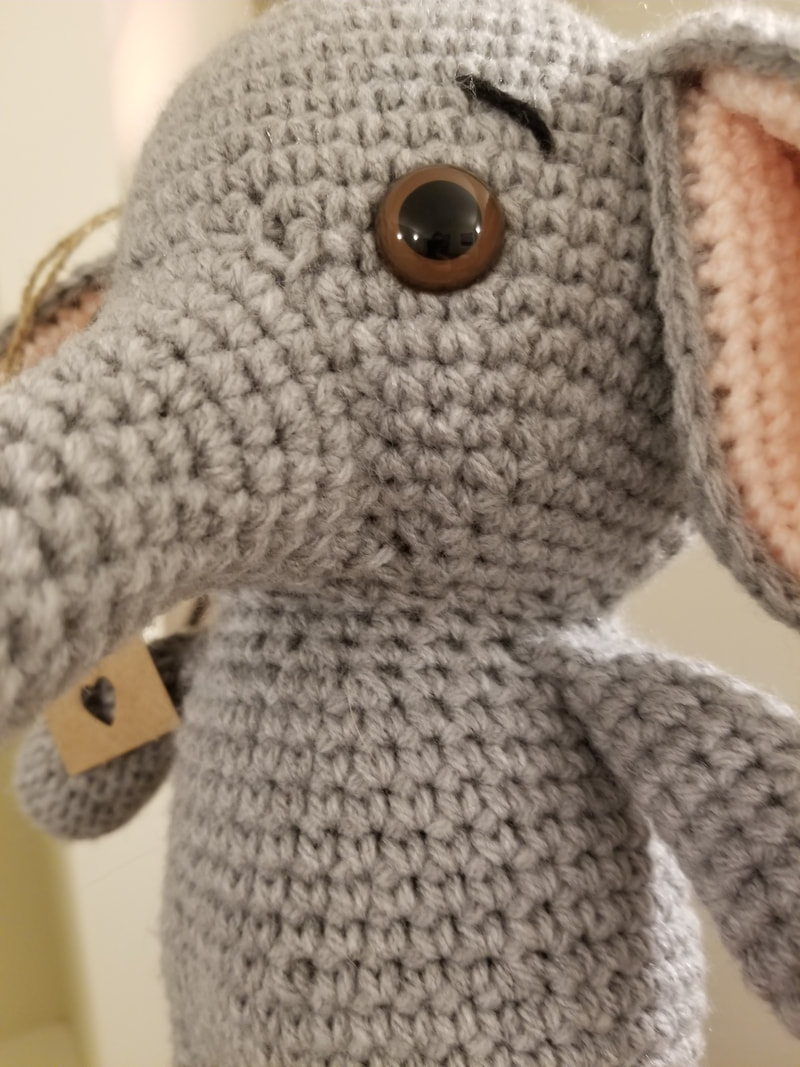
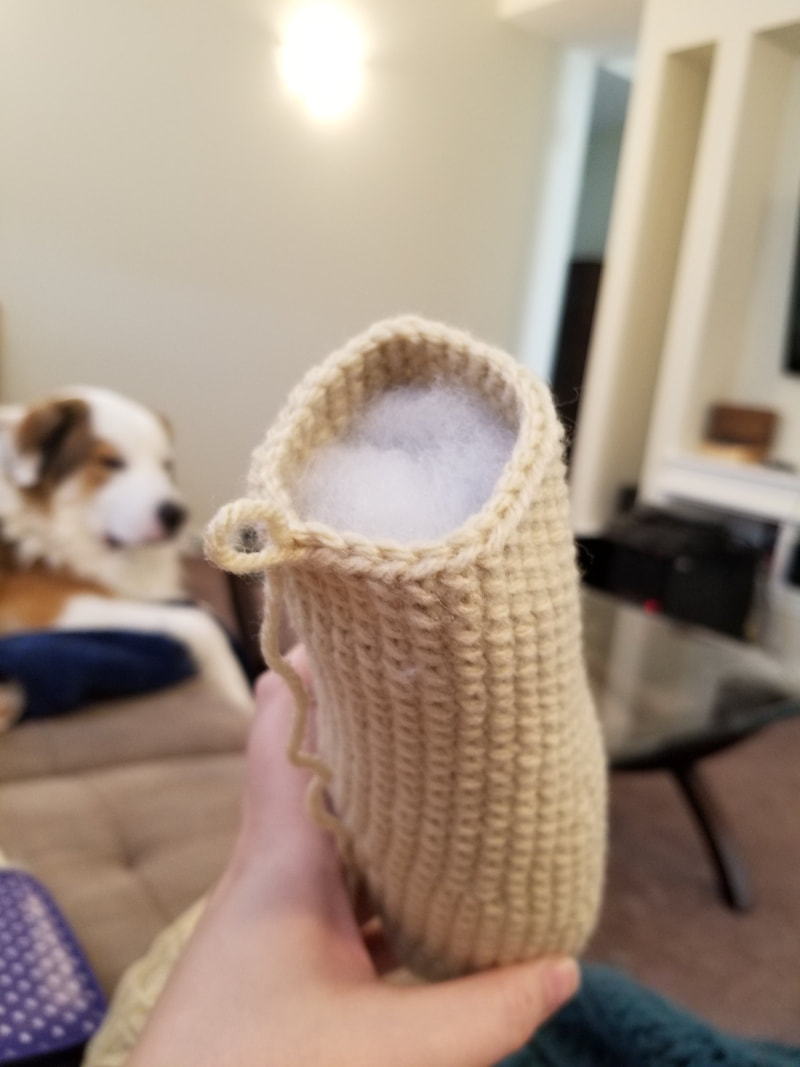
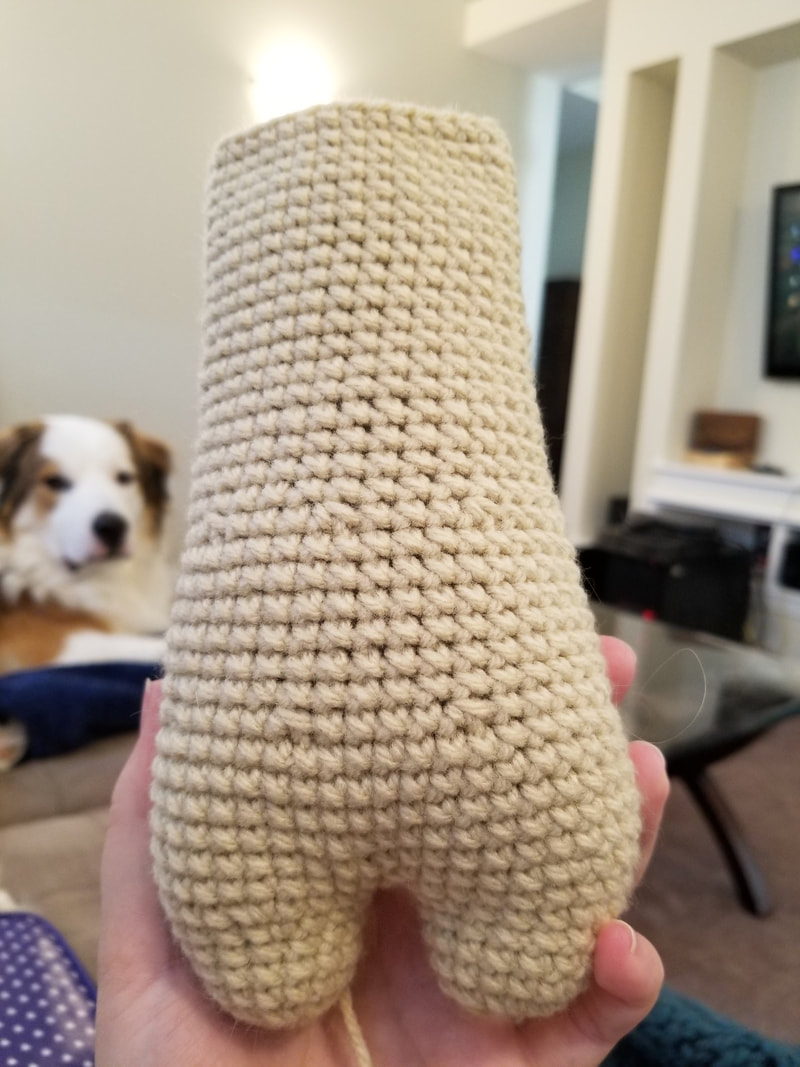
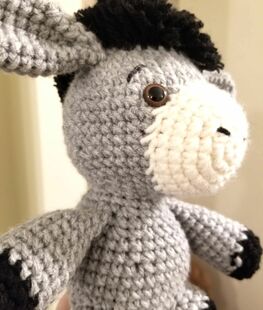
Body (and Legs)Start with the legs (Make 2): 1: Start 8 SC in a magic ring (8) 2: Inc x8 (16) 3-5: SC in all (16) 6: [3SC, Inc] x4 (20) Fasten off first leg with a slip stitch. Do not fasten off the second leg, you will continue crocheting to attach the legs together. Body: Continue from end of second leg: 1: 10SC, now pick up the other leg and continue to SC 20 stitches all the way around that leg. Now starting in the 11th stitch of the first leg, finish the last 10SC until you finish the round (40) 2: SC in all (40) 3: [4SC, Inc] x8 (48) 4-8: SC in all (48) 9: [4SC, Dec] x8 (40) 10-14: SC in all (40) 15: [3SC, Dec] x8 (32) 16: [4SC, Dec] x5, 2SC (27) 17: SC in all (27) Fasten off and leave a long tail for sewing. Stuff the body with fiber filling and sew onto the head. ArmsUsing the light grey yarn (Make 2): 1: Start 6SC in a magic ring 2: Inc x6 (12) 3: [3SC, Inc] x3 (15) 4-8: SC in all (15) 9: [3SC, Dec] x3 (12) 10-12: SC in all (12) 13: [4SC, Dec] x2 (10) 14: SC in all (10) Fasten off and leave a long tail for sewing. Stuff the arms with fiber filling and sew onto the body. I like to leave 1 row of stitches in the body between the top of the arm and the head so it looks like the elephant has a little neck and shoulders, and the arms aren't connected to the neck. Tail and EyebrowsYou're almost there! Now for the finishing touches: Tail Using the light grey yarn: 1: Chain 3 2: Cut yarn about 6inches and pull yarn through the last loop but do not tighten yet. 3: Cut a couple pieces of yarn (approx 6 inches) and pull both thos pieces of yarn through the lats loop of the chain (the one you haven't tightened yet) 4: Tighten the last loop now so the other bits of yarn are secured 5: Wrap the remaining yarn around the tail a few times then pull the yarn through the wrap. 6: Trim the yarn pieces (hair of the tail) to the desired length. Probably around half an inch 7: Sew tail onto the bum! Eyebrows Using black yarn or black embroidery thread: 1: Pick the placement for your eyebrows. I found that a couple rows above, and one row over (away from the nose) works well. Make sure to have them slanted the way I have them in the picture. It gives them a cute innocent look :) 2: Cut the yarn to about 6 inches and sew through the two points of the eyebrow. 3: Now you can tie the two ends of the eyebrow together. I just do a regular knot you would do when tying your shoes, twice. Make sure the knot is tight 4: Now you can trim the excess pieces of yarn (leave about a cm) and rotate the eyebrow thread so the knot goes inside the head! 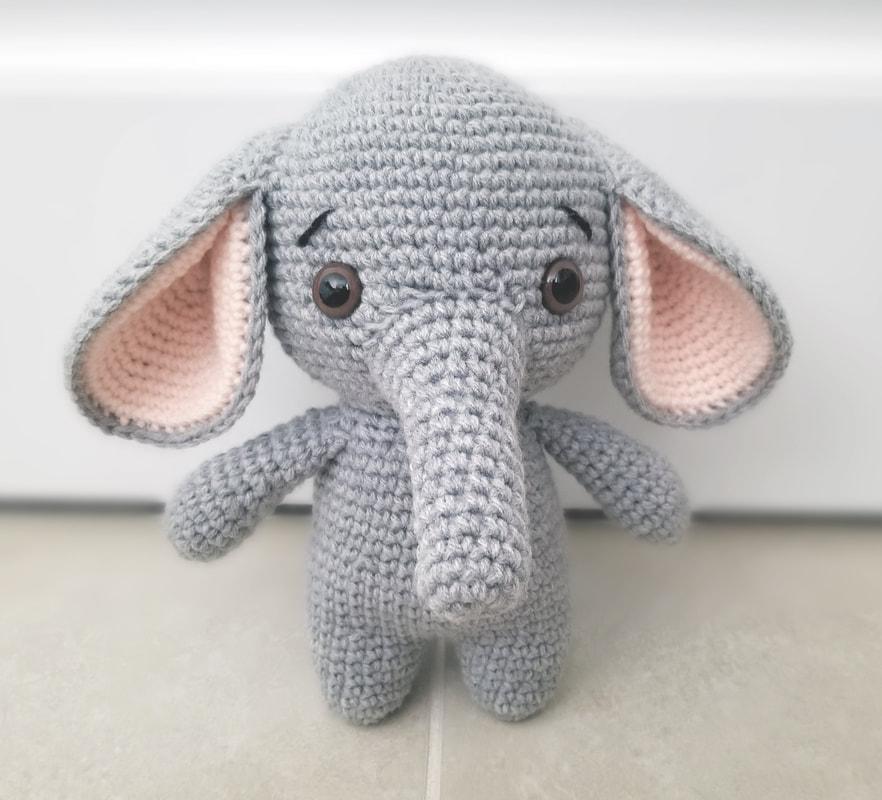  And that's it!! I would absolutely LOVE to hear about your experience with this pattern. If you have any questions feel free to leave a comment below! Love, Nikki |
AuthorNikki Moore - artist and blogger. Owner of Stuffed Hearts Crochet ArchivesCategories |


 RSS Feed
