 When I was a kid, I remember getting a DIY teddy bear for a birthday gift. A package with pre-cut fabric pieces, thread, doll eyes, and stuffing. For those of you who don't know me yet, I am a craft addict. I love to make things. It was a fantastic gift and I had a blast making it. For this next pattern I decided to do a little twist on the classic teddy bear, inspired by that gift. What you will need
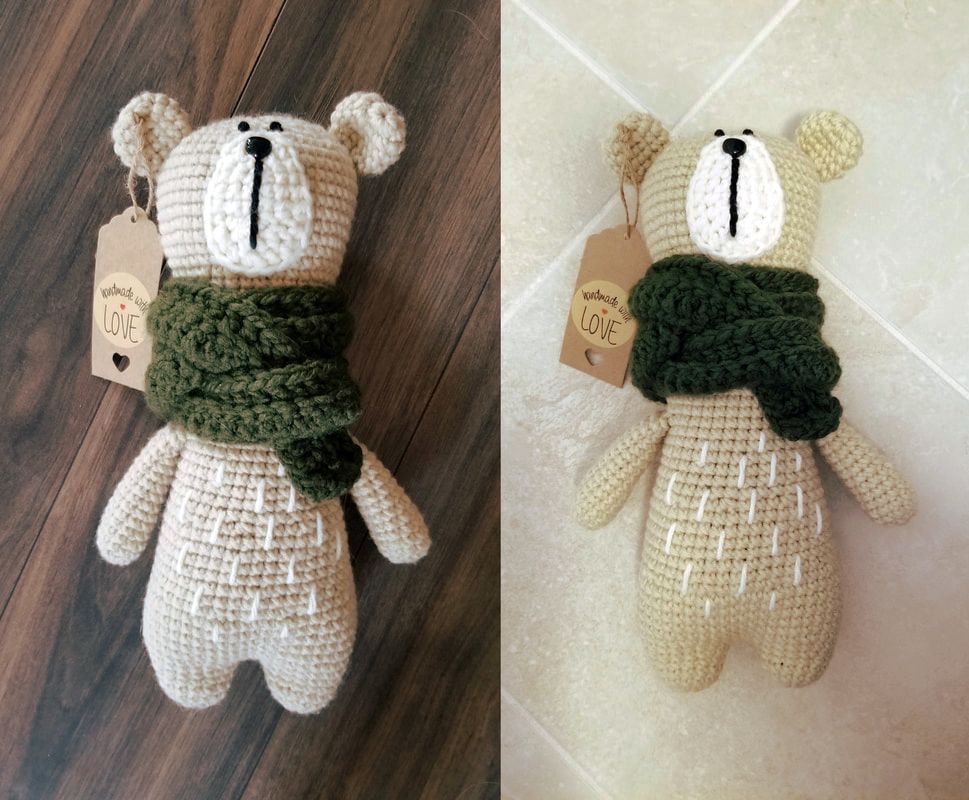
NotesUnless otherwise specified, all parts will be worked in continuous rounds. It is important to use your stitch markers at the end of each round so you don't lose your place! I always start all my rounds with a magic ring. You can watch a video about how to do that here. If you do not want to use a magic ring, you can chain one, then crochet the specified amount of stitches into that chain. I highly recommend using a magic ring because you can tighten the ring after you have done a few rows and it eliminates any gaps in your work. Make sure to always be working with the outside of the shape facing you while you crochet around. This side is the "right" side. In my amigurumi, I usually like to use the cross stitch single crochet. This is definitely not required but I find it gives a nicer look to the finished product. You can watch a video on how to do this stitch here. Here is a comparison of the two different stitches:
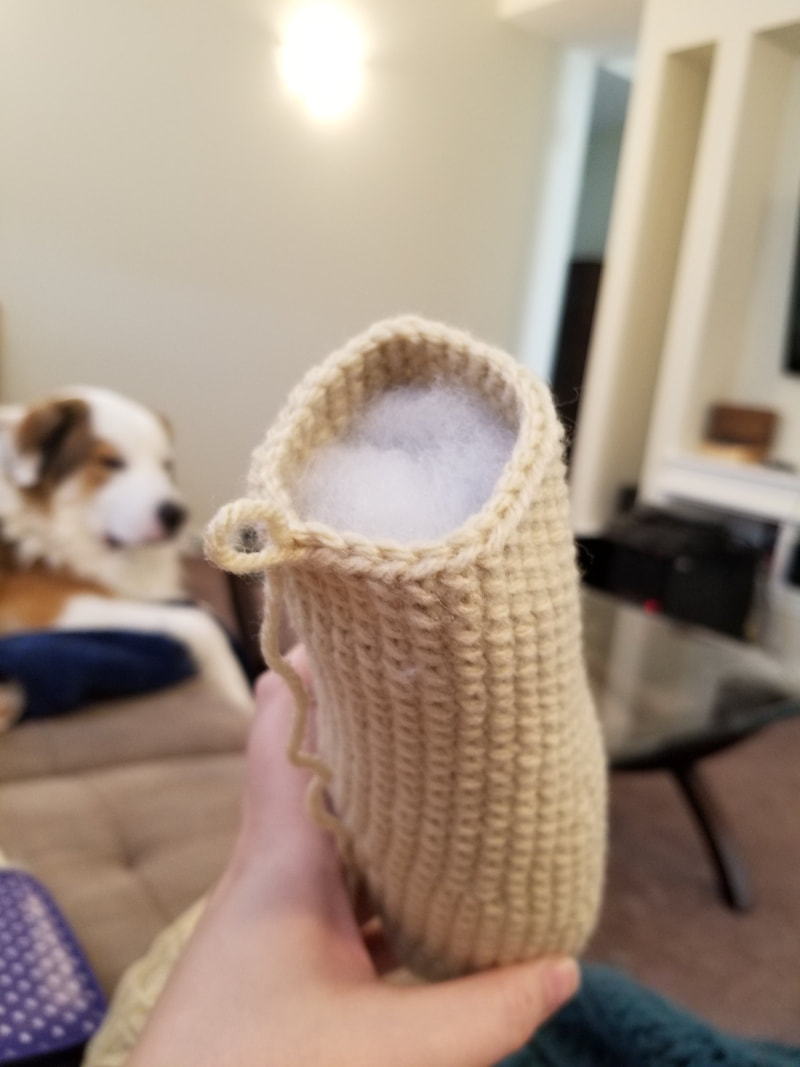
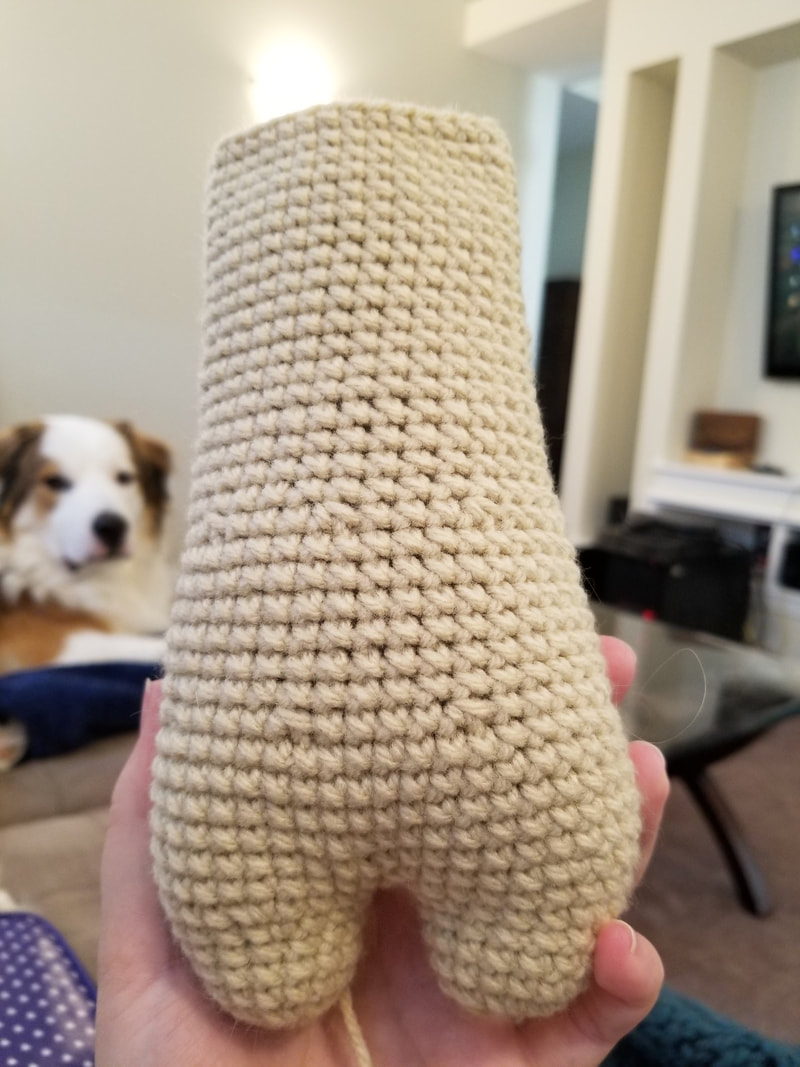
AbbreviationsSS: Slip Stitch, CH: Chain, SC: Single Crochet, HDC: Half Double Crochet, Inc: SC Increase (2 SC in same stitch), Dec: SC Decrease (if you do not know how to do this, watch this), BLO: Back Loop Only, [ ]: When you see this, you will be repeating the pattern inside the brackets, ( ): Total number of stitches for that round PATTERNBody (with legs and head)Start with the legs (Make 2): 1: Start 8 SC in a magic ring (8) 2: Inc x8 (16) 3-5: SC in all (16) 6: [3SC, Inc] x4 (20) Fasten off first leg with a slip stitch. Do not fasten off the second leg, you will continue crocheting to attach the legs together. Body: Continue from end of second leg: 1: 10SC, now pick up the other leg and continue to SC 20 stitches all the way around that leg. Now starting in the 11th stitch of the first leg, finish the last 10SC until you finish the round (40) 2: SC in all (40) 3: [4SC, Inc] x8 (48) 4-7: SC in all (48) 8: [4SC, Dec] x8 (40) 9-14: SC in all (40) 15: [3SC, Dec] x8 (32) 16-22: SC in all (32) At this point, the body should be starting to get long. Start filling the legs and body with fiber fill at this point so it isn't so hard to stuff later.
Shameless Plug...I also make custom dog tags on Etsy. If you are in the market for some, please check out my shop PersonalizePenguin!
Leave a stitch marker in this row because this is where the arms are going to be sewn on. It might seem low, but don't worry, it will all come together later. 23-36: SC in all (32) 37: [3SC, Inc] x7, 4SC (39) 38-40: SC in all (39) 41: [3SC, Inc] x9, 3SC (48) 42-48: SC in all (48) 49: [3SC, Dec] x9, 3SC (39) 50: [Dec, 2SC] x9, 3SC (30) 51: [2SC, Dec] x7, 2SC (23) Stuff the remaining half of the body with fiber fill now. Don't worry about the eyes, because they will be stitched in with yarn later instead of using safety eyes. 52: [Dec, SC] x7, 2SC (16) 53: Dec x4, then weave through front loop of each remaining stitch and pull closed. Fasten off and weave in the end. ArmsMake 2: 1: Start 8 SC in a magic ring (8) 2: Inc x8 (16) 3-4: SC in all (16) 5: Dec, 14SC (15) 6: SC in all (15) 7: Dec, 13SC (14) 8-15: SC in all (14) Stuff with fiber fill. Slip stitch the arm closed then fasten off. Leave a long tail, then sew onto the body on either side on row 22 (as marked above). EarsMake 2: 1: Start 8 SC in a magic ring (8) 2: Inc x8 (16) 3-4: SC in all (16) 5: [SC, Dec] x5, SC (11) 6: Dec x4, then slip stitch the ear closed and fasten off (you do not need to stuff the ears with fiber fill). Leave a long tail for sewing, then sew on the ears wherever looks the cutest! SnoutUsing the white (aran) yarn: 1: Make a slip knot and Ch5 2: Starting in the 2nd chain 3SC, SC 3 into the same stitch, 2SC, Inc (10), then join with a SS 3: Ch1, then into the same stitch that you joined in the last round: Inc, SC, HDC, 2HDC x4, HDC, SC, Inc x2 (18), then join with a SS 4: Ch1, then into the same stitch that you joined in the last round: Inc, 3SC, HDC, [HDC 2 into the same stitch, HDC] x4, 3SC, Inc, then join with a SS (24) Fasten off and leave a long tail for sewing. Put this aside until the nose and mouth are attached. Eyes, Nose, Mouth, HairMouth: Take the snout (which should look like and egg shape). and turn it so the small part of the egg is facing up. Starting in the middle, from the second stitch down, sew a "line" down the snout for 8 stitches (or 2 stitches from the bottom). Nose: Attach the safety nose now, to the top of the mouth line (1 stitch from the top of the "egg" shape). Attach the snout to your bear head now. See image below for placement guidelines. You may want to use pins to keep the snout in place while you sew it to the head. 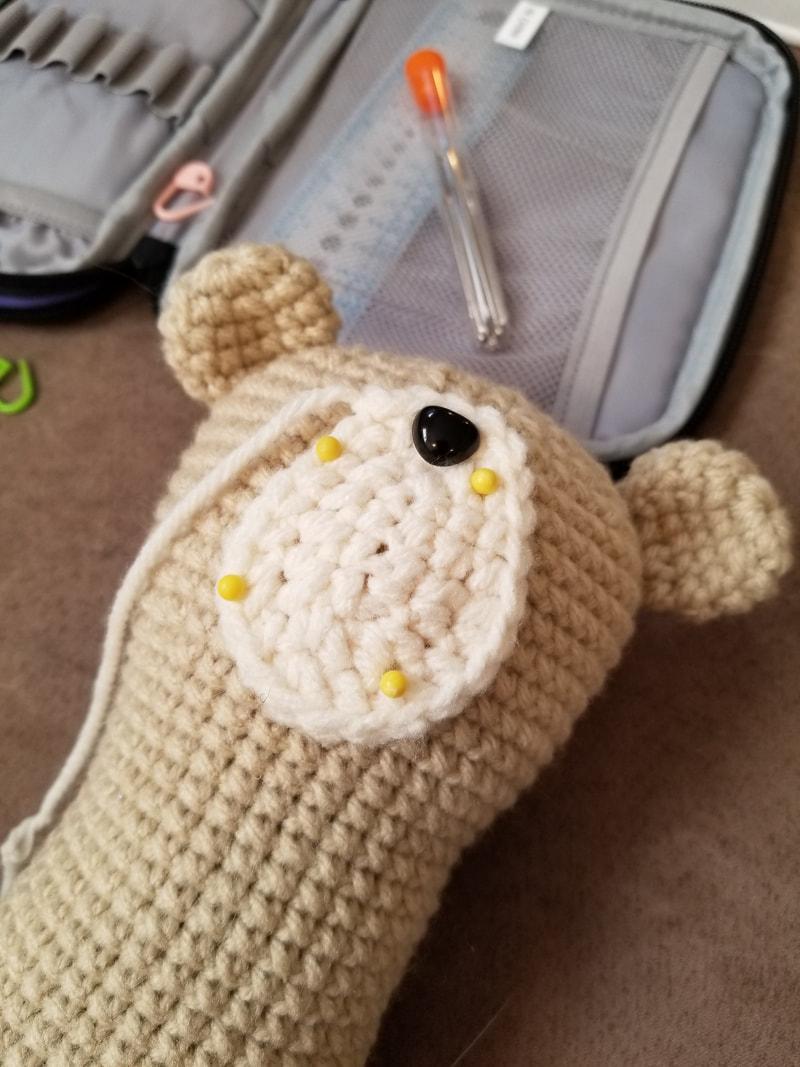 Placing the Snout on the bear. NOTE: I didnt stitch the mouth on before the nose, and it was a huge mistake! It is much easier to stitch the mouth on, then the nose, then sew it on the head. Eyes: Make 2: 1: Cut a piece of black yarn about 6 inches long. 2: Tie a knot 3 times around (see video here for instructions). 3: Sew eyes right above the snout, with 2 stitches between. Belly hair (optional): 1: Cut the yarn to about 6 inches and sew through the two points of the hair you want to add. 2: Now you can tie the two ends of the yarn together. I just do a regular knot you would do when tying your shoes, twice. Make sure the knot is tight 3: Now you can trim the excess pieces of yarn (leave about a cm) and rotate the yarn so the knot goes inside the body. Repeat for any amount of hair pieces you want to add! I just put them randomly all over the belly. ScarfUsing the thick yarn (I used Charisma in "Forest") and same hook (4mm): 1: Ch 91 2: Starting from the 3rd chain from hook, DC in all chains 3: Ch 2, DC in all stitches in the BLO Fasten off and weave in ends. Wrap the scarf around your bears neck making sure it is really hugging his chin! You can just tuck in the end to make it stay.   I would love to hear about your experience with this pattern! Feel free to post any comments or questions below!! :) Love, Nikki
81 Comments
3/29/2019 10:54:04 pm
Thanks so much Kaylee! I would love to hear about your experience with the pattern! ?
Agnes Falsetti
8/8/2021 11:42:47 am
J adore...
Kerry Roberts
1/31/2024 11:28:47 am
Hi Nikki, thank you for the bear pattern. It's so cute. I got a bit lost on the snoutbut followed the link you gave. Now I am stuck on the body hair. I don't understand the instructions 🤔
Tiina
6/19/2019 12:58:46 pm
Such a lovely pattern, and a relatively easy too!
Nikki Moore
6/19/2019 06:45:42 pm
Thanks so much Tiina! :)
Hailey
6/21/2019 09:22:40 am
With a medium weight yarn, about how tall is this cute little guy?
Nikki Moore
6/23/2019 05:13:37 pm
Hi Hailey! Mine turned out to be around 11.5 inches with medium weight yarn. My stitches were fairly tight also. I would say it could range between 10-13 inches depending on how tight your stitches are.
Hailey
8/10/2019 12:20:19 pm
Awesome thanks!
camila
9/1/2019 02:36:53 pm
Hi! I cant do the snout. I do not understand the stichies. Can you help me please?
Nikki Moore
9/1/2019 02:58:19 pm
Hi Camila! I actually found a YouTube video with the same pattern for the shape of the snout.
Lanetta Sprott
1/14/2021 11:32:36 am
Well, Bummer!!!
Caitlin
11/18/2019 12:05:25 pm
I loved this pattern, it was easy to follow and fun to make. When I showed the finished bear to my family everyone wanted one 🙃
Nikki Moore
11/18/2019 06:42:40 pm
Thanks so much Caitlin I'm glad everyone loved it!
Ines Molinos
11/23/2019 01:30:45 pm
I am truly in love with this bear. I haven't give it a go yet...I was wondering if you have any objection if I try to sell it in markets? Of course, in a small amount and naming you. Thanks
Nikki Moore
11/23/2019 02:48:56 pm
Hi Ines, thank you! I dont have any objection to the sale of the finished product. I would only have an objection to the sale of the pattern itself.
Elizabeth Ernst
12/3/2019 06:19:28 pm
Love this pattern! Fun to make & super cute!
Nikki Moore
12/9/2019 10:45:35 am
Hi Elizabeth! Thanks so much I'm glad you enjoyed it :) unfortunately this blog site doesnt allow image posts in the comments. I wish I could see everyone's finished product!
Maria
12/8/2019 07:47:42 pm
I really love this bear and pattern! Just finished row 22 and the bear is already 11 inches and seems very large I’m not sure why it’s so big at this point so far
Nikki Moore
12/9/2019 10:43:08 am
Hi Maria! Are you using the same weight of yarn and hook size as in the pattern? If so it's possible the stitches need to be a bit tighter. I would recommend trying a smaller hook size to get those stitches a bit smaller. For amigurumi it's best if the gaps are very small so the stuffing doesnt show through.
carina secul
12/26/2019 08:11:28 pm
Es. Lo mas lindo ❤😍🐻
carina secul
12/26/2019 08:51:16 pm
Hola nikki, donde puedo mostrarte que que yo hice ? Tienes instagram ? 1/14/2020 06:17:25 am
I follow poppycrochetdesign and that lead me to your website.
Petra
2/1/2020 01:44:53 pm
I’ve never crocheted before. I want to learn to be able to make this. Once I get basic skills.... would it be too difficult for me to have a try? It’s SOOOOOOOO cute!! 3/22/2020 06:43:53 am
Hi 3/22/2020 10:31:43 am
Hi Isabel. That sounds great of course you can :). Thank you!
Berckmans Marianne
3/29/2020 06:52:39 am
Zo'n schattig beertje!
Robbie
4/2/2020 06:53:42 pm
I just love this bear hut I am wondering why it has hairs on it?
Yarn Lady
4/3/2020 07:55:44 pm
I would love this to do while offline but cant find a pdf for so i can download it to my device and work it up. This would be nice with a small blanket like a lovey toy.
Patty
4/15/2020 02:01:15 pm
Hi, are these English or American stitches?
Dayle
4/18/2020 01:04:46 pm
I made my first Oliver bear at Christmas for a new great nephew. This pattern has become my favourite pattern at the moment. I just finished my 5th and have them in my window during isolation. Thanks for such a cute pattern!
Marge
4/19/2020 10:18:29 pm
Hi Nikki ! The bear is really cute thanks for sharing your pattern! Im just having problems with the snout ..i could not seem to follow the instructions correctly
Patty
4/20/2020 01:27:35 am
I'm having difficulties with the snout too.
Lanetta Sprott
1/14/2021 11:24:11 am
Love Oliver! I've made him for my 91 year young mom's Valentine Day's gift.
Samary
6/18/2022 10:36:55 pm
Sorry,I know it may be late for the response but, she replied to an earlier post with this question to use an egg shaped pattern. She shared this video and it helped me a lot!
Cabbie
6/1/2020 08:24:48 am
Thank you for sharing your pattern! The bear is super cute!
Linda Martin
6/5/2020 04:58:34 pm
Thank you so much for this pattern. He is the cutest bear ever. I made him and enjoyed making him. Easy pattern and great instructions. I also had a hard time with the snout but I made my own snout. Turned out great!!!
Lyn Hadley
6/6/2020 08:04:35 am
Help! When crocheting the 10 stitches, picking up the 2nd leg, crocheting 20 around, then the next 10, I end up with 32 stitches. No matter what I do I can't get 40 stitches. what am I doing wrong?
lyn
6/6/2020 09:47:31 am
never mind. I'm an idiot.
Sheri
7/12/2020 10:16:06 pm
What size safety nose did you use? 10/14/2020 08:53:05 pm
I recently made this bear (Oliver) but I am stuck on completing the snout. I don’t understand the directions for making his snout. After the first step to ch5 I can’t figure out what to do. Can you be more explicit with the directions please.
Sydney BECK
10/15/2020 06:42:47 am
This pattern made the cutest bear. He has so much personality and is quite large. Love him. Thank you
khonlek
10/31/2020 10:41:13 pm
I am new starter :) Thank you for sharing your lovely bear pattern.
Carolyn
12/2/2020 02:30:35 pm
I just love this bear & my grandson will too. Thank you for the pattern and referral to you tube video for creation on the snout. It was perfect & helped tremendously!
Tina
3/9/2021 09:01:40 am
I am starting on this right now. Thank you so much for sharing the pattern, ot is quite lovely.
Mominsault_trade
4/2/2021 09:40:32 am
Thank you for sharing this pattern. I really enjoyed making it! It’s so cute!
Pyza
4/13/2021 02:28:34 pm
🐻Śliczny misiu, bardzo fajnie się go dziergało. Dziękuję za udostępnienie tego wzoru. Jest bardzo uroczy 🥰
Bertha
8/30/2021 07:08:17 am
Hi
Sue
9/30/2021 08:52:20 am
I am round 37 where it ends in 4 sc. Where would those 4 sc fall on the body? With continuous spirals the marker moves across the body. I would think it does matter. Same with the rest of the rounds that end with 3 sc. Thank you!
Evelyn
11/11/2021 11:23:57 pm
What a cutie!!! Thank you for adding the links to the tutorials, they were very helpful. Cross stitch crochets are new to me. I’ll be sure to try them out making Oliver for my newborn niece!
Judy
1/24/2022 02:24:28 pm
I may be a little late to the discovery, but this pattern is o-so-deserving of a shout out. I've made it several times, and other than a slight alteration to the ears, the pattern is easy to follow and made with a small crotchet hook, the finished product has a dense construction that will withstand the tests of time.
Hann
3/30/2022 02:20:02 pm
Really enjoyed this pattern. Was a little worried it would turn out ok when I was making the long neck. Thanks for the remark that it was suppose to look like that!
Luzia
4/1/2022 09:14:06 am
Seu padrao de urso é simplesmente lindo !!! Minha duvida é se ele pode ser comercializado , a peça , pois é preciso fazer tudo certo. Por que ele é adoravel e nao tem como não se encantar por ele. :-) :-)
Diana Bär
8/22/2022 11:13:52 am
Hallo, ich finde den Bären wirklich total süß und hab angefangen ihn zu häkeln, aber irgendwie komm ich nicht weiter. Was häkel ich von Reihe 23 bis 39 ....? Oder fehlt mir ein Stück der Anleitung 🤔
Rebecca Burnett
8/24/2022 10:59:10 am
Does this bear have a tail? Am I missing it in the pattern? Thanks! 12/9/2022 05:43:55 pm
kaliteli düşmeyen takipçi satın al: https://takipcialdim.com/ 12/9/2022 08:45:16 pm
Tiktok takipçi satın almak için tıkla: https://takipcialdim.com/tiktok-takipci-satin-al/ 12/9/2022 08:47:12 pm
İnstagram beğeni takipçi satın al: https://takipcialdim.com/instagram-begeni-satin-al/ 12/15/2022 04:10:59 pm
uygun fiyatlardan takipçi Hemen Göz At: https://takipcim.com.tr/ 12/20/2022 03:01:09 am
İnstagram takipçi satın almak istiyorsan tıkla. 1/5/2023 11:20:06 am
100 tl deneme bonusu veren siteleri öğrenmek istiyorsan tıkla.
Kaitlyn
2/5/2023 07:22:15 pm
I love this! I’m making one for a friend of mine who recently had a baby. Could you explain how to finish the top of the head? I’m a little confused about how to weave through the front loops in the last row of that section
Nina
11/25/2023 07:49:37 am
You are so brilliant Nikki, thank you kindly for sharing your work with us.
Caitlin
1/8/2024 10:13:17 am
This was so fun! It was easy to read and understand and it turned out perfect. Leave a Reply. |
AuthorNikki Moore - artist and blogger. Owner of Stuffed Hearts Crochet ArchivesCategories |


 RSS Feed
