|
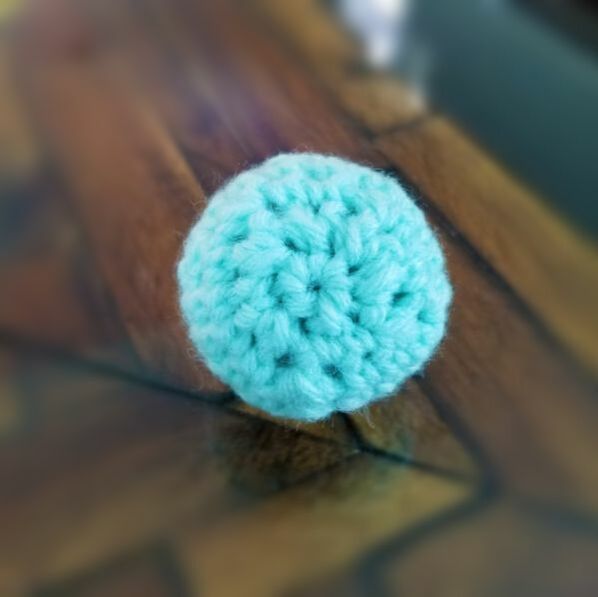
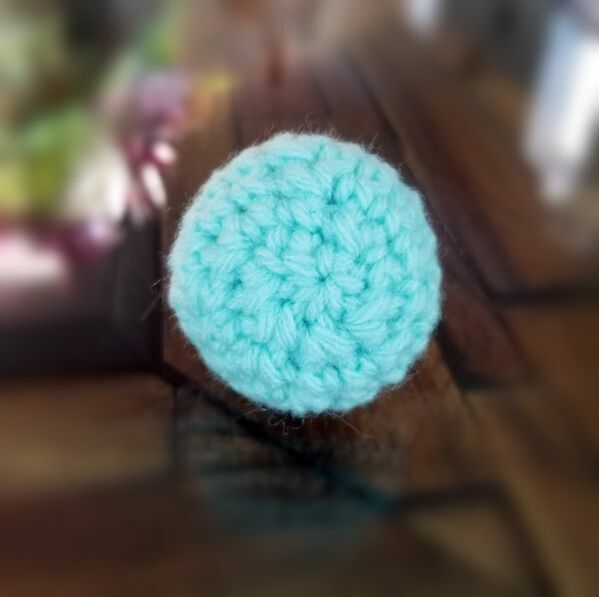
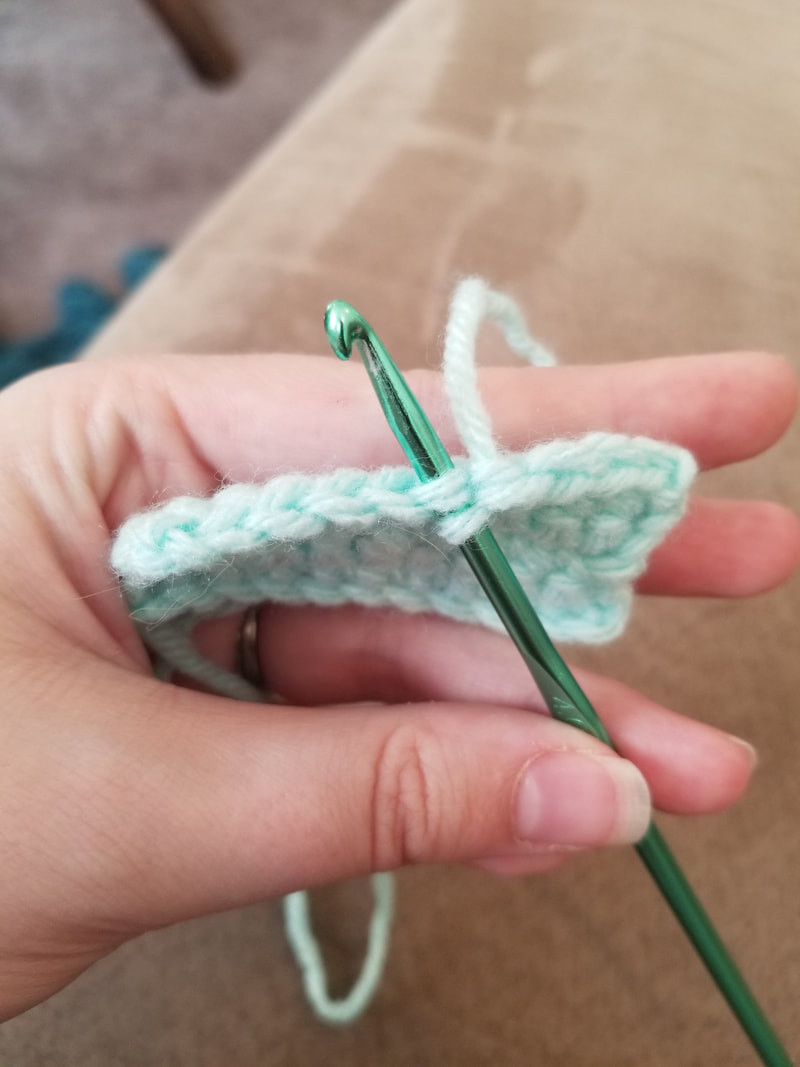
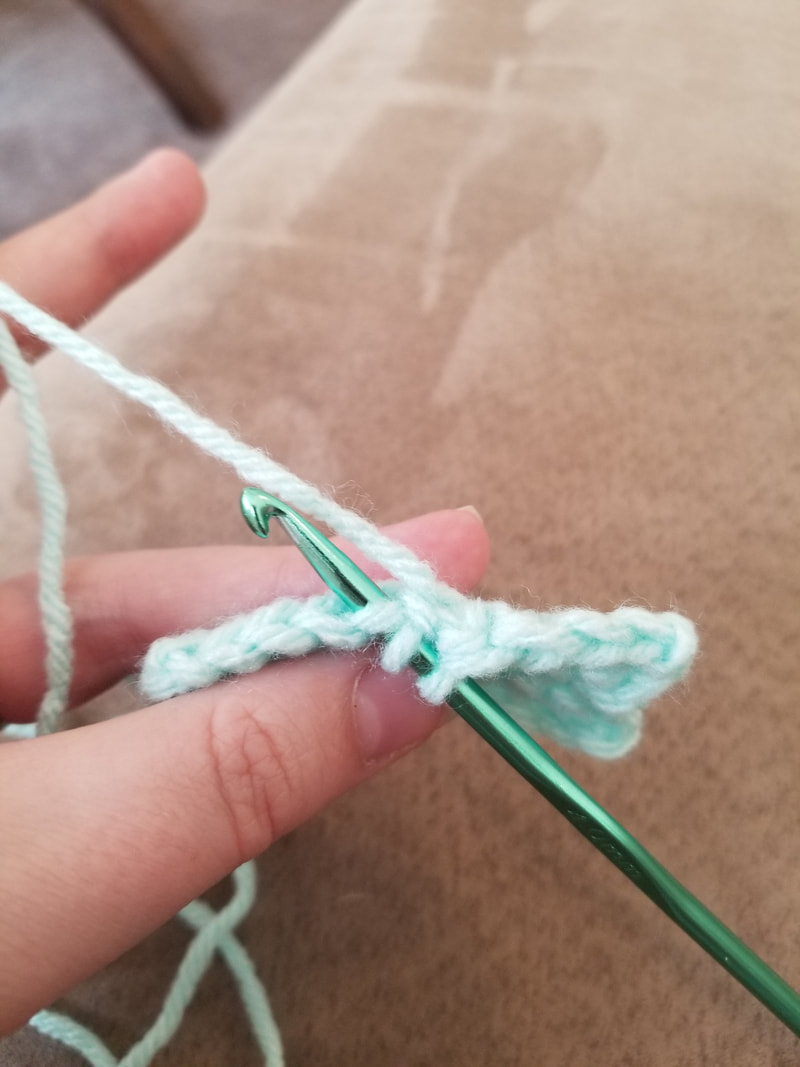
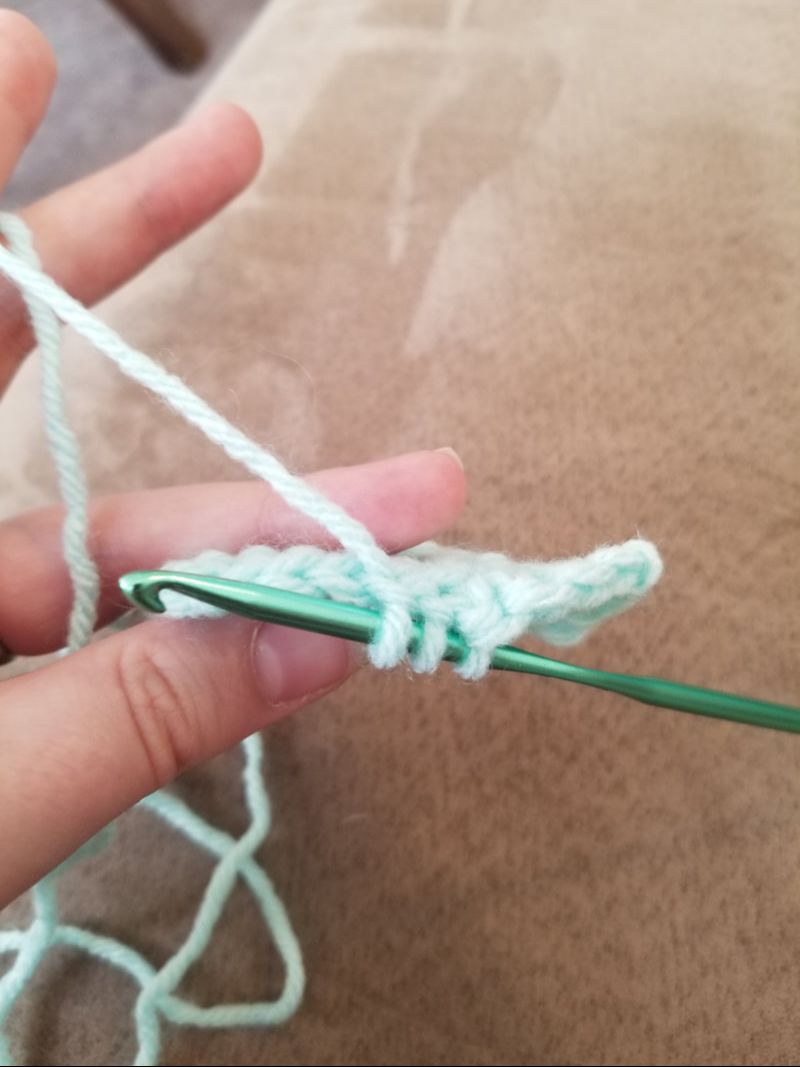
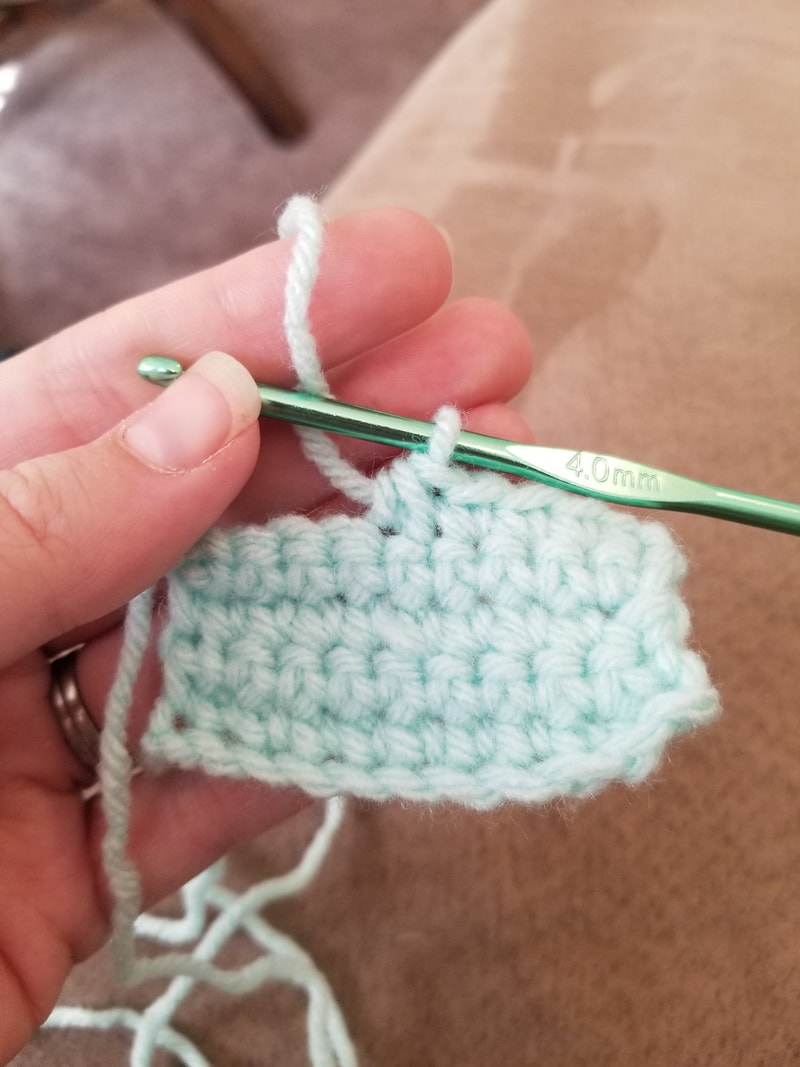
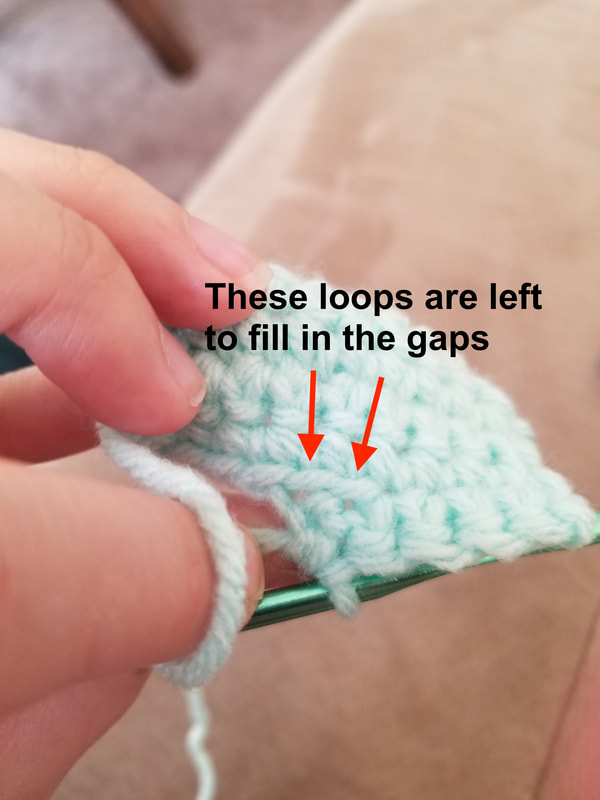
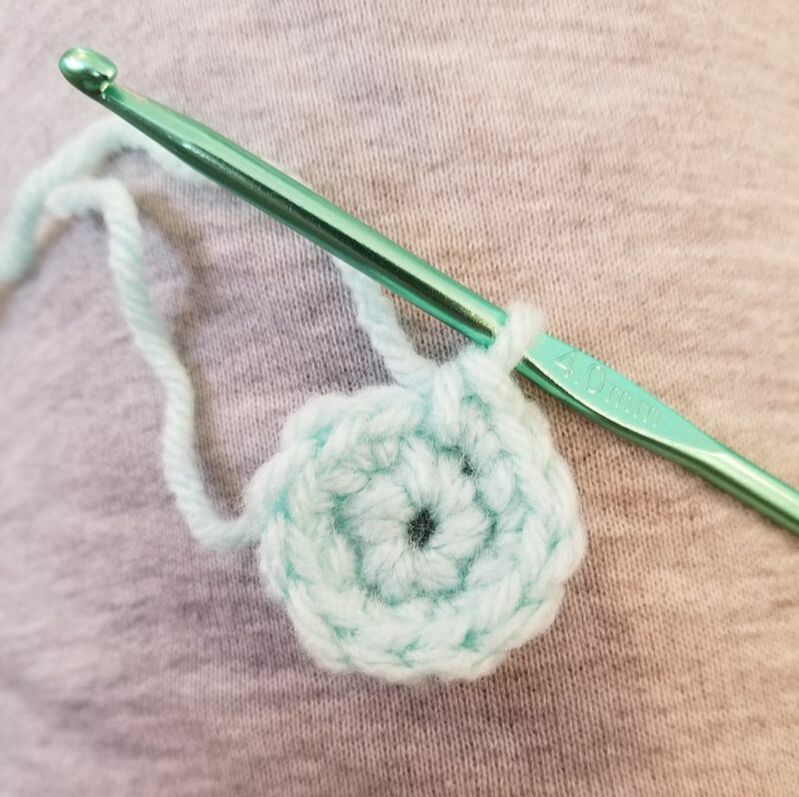
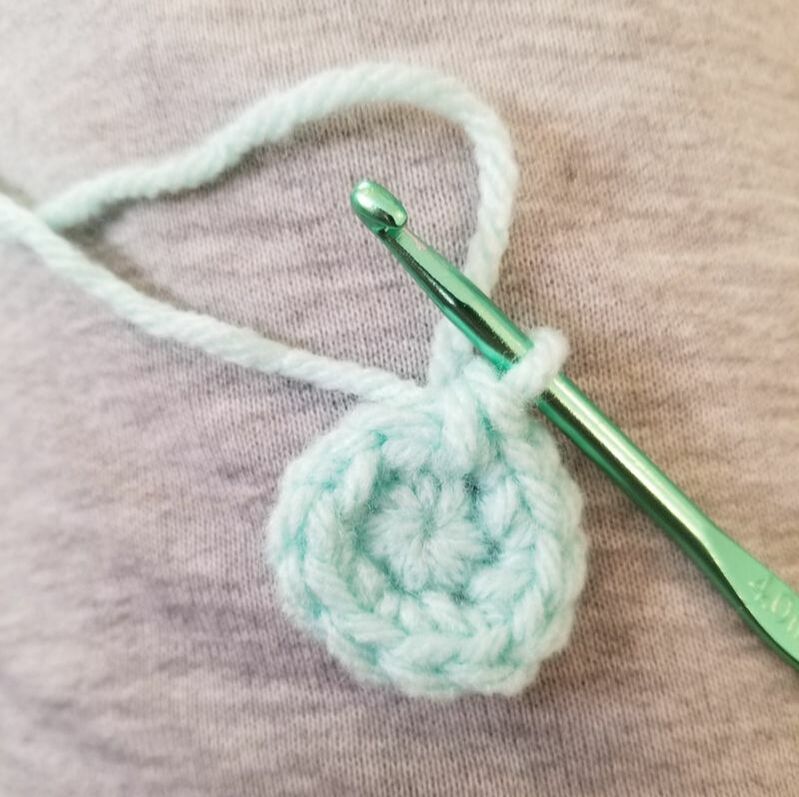
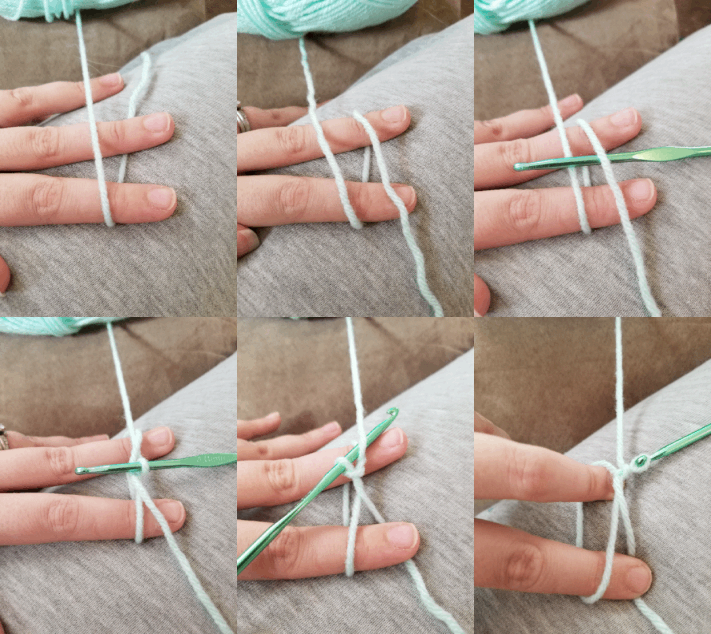
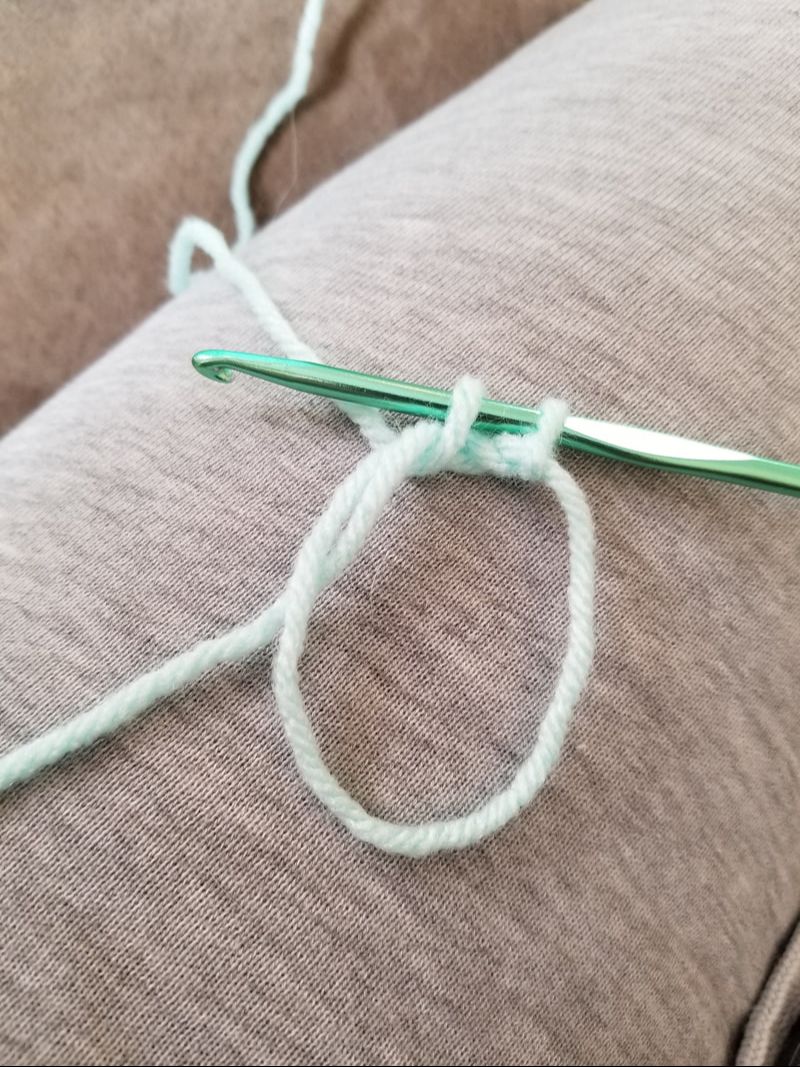
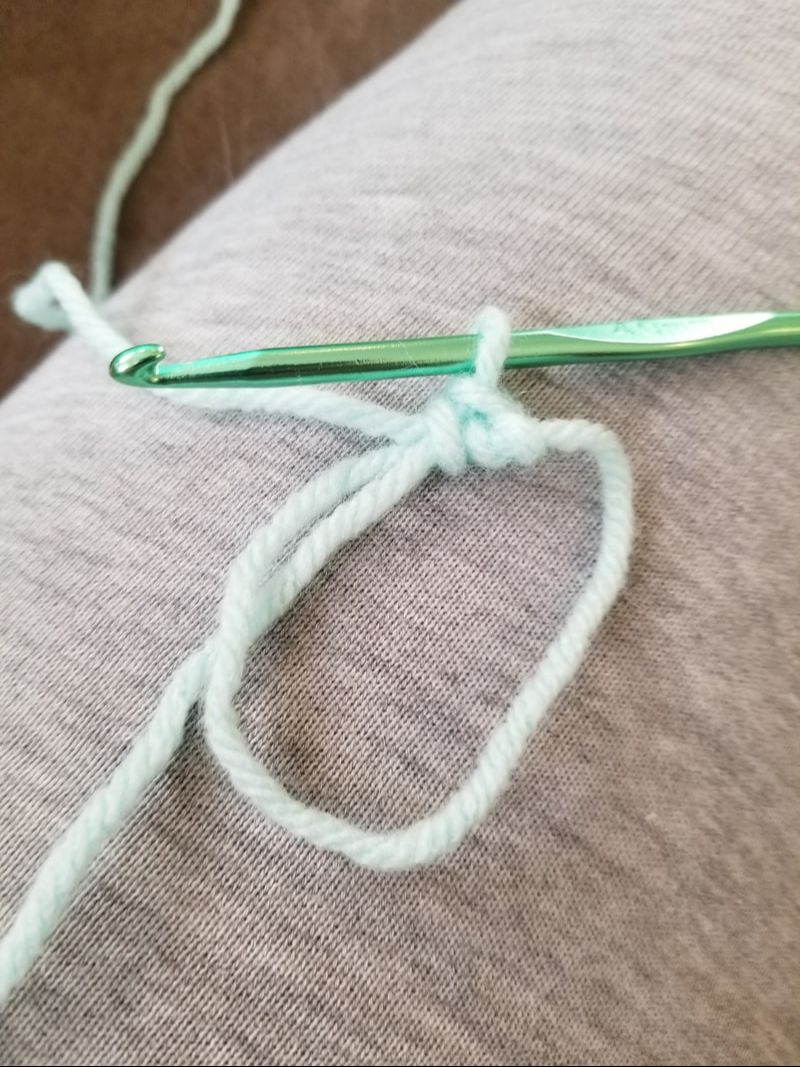
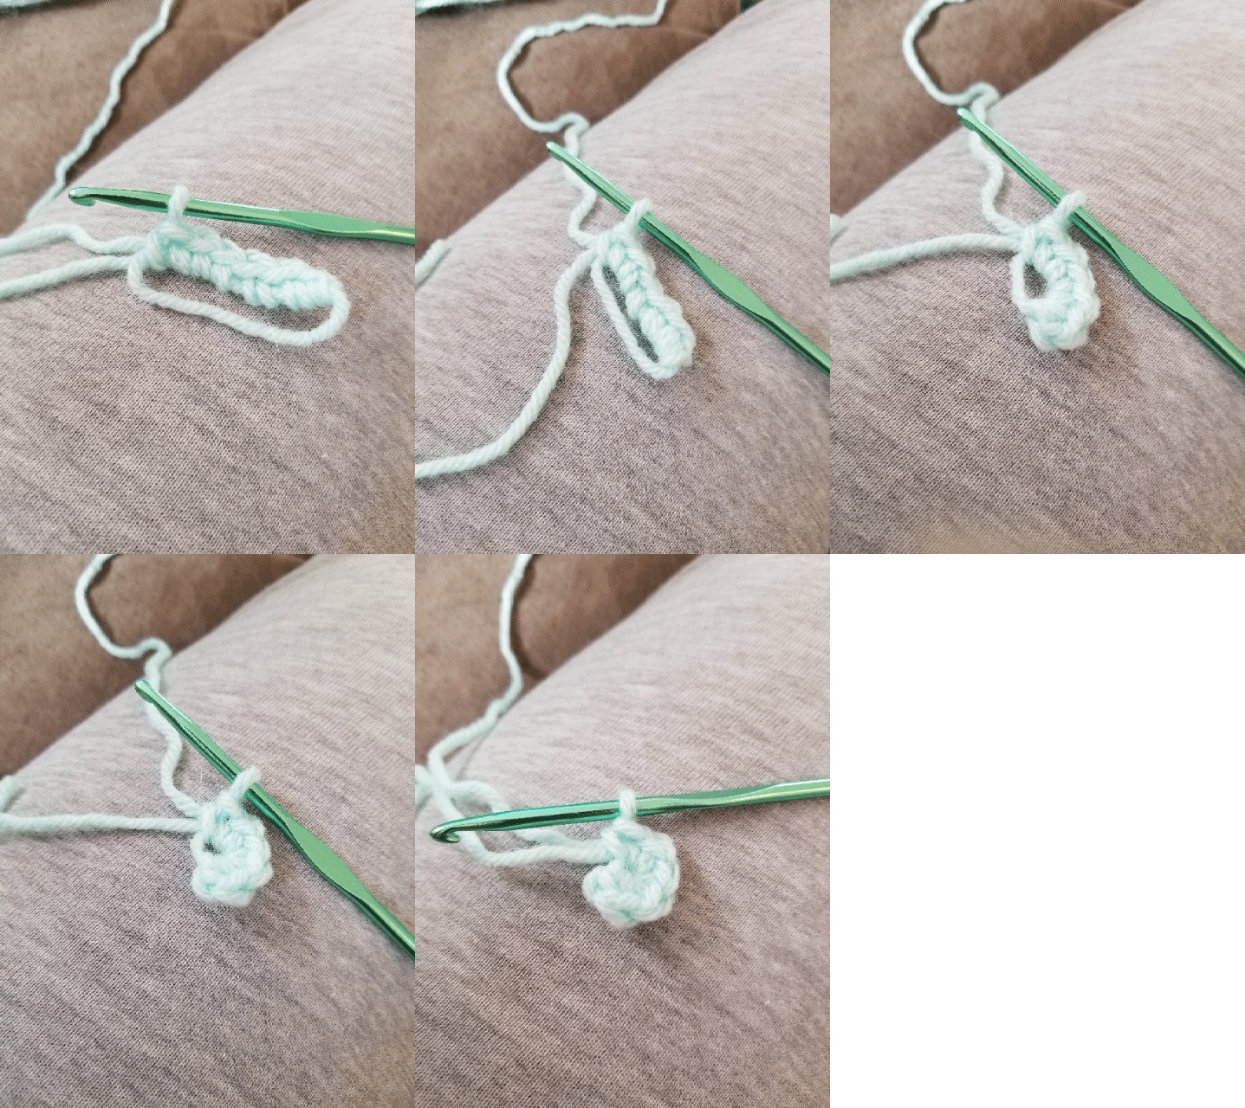
Since I started making amigurumi (which I am in LOVE with by the way), I've come across some pretty valuable techniques that have really transformed the look of my work. Pretty much all of these techniques are super simple, but make a huge impact on the overall look of amigurumi projects. In the hopes that others can find these techniques useful, I have shared the 4 things that I think make amigurumi look more beautiful! 1. Use the invisible decreaseHave you ever made an amigurumi head and wondered why one side looks amazing and the other side is full of gaps? Yeah, this happened to me ALL the time when I first started out. Until I found out I could avoid this almost entirely with the invisible decrease technique. I honestly don't know why this isn't more popular! It is an amigurumi game changer. Here is a comparison of a normal decrease and an invisible decrease: Amazing right?? There really is no reason to do a normal decrease ever again. Using this technique will make your projects look so much neater and professional. The only difference between a normal decrease and an invisible decrease is instead of inserting your hook through both the loops in the stitches, you insert your hook through the front loops only. This leaves the back loops in place so they can essentially fill in the gap where the other loop is pulled up. That's it! You can use this method for any type of crochet really. I personally haven't had a reason to use a normal decrease since I learned about this method. 2. Always use magic ringsIf you are intimidated by magic rings, don't be! They are actually very easy to do, and they will make a huge difference in the way your amigurumi projects turn out. The reason these rings are "magic" is because you can pull the yarn tight to adjust it, leaving absolutely no gap in the middle. Here is a side by side comparison of a normal ring and a magic ring As you can see there is not a gap to be seen in the magic ring. Gapless work is the key to making super neat and tidy amigurumi. If you do not know how to do a magic ring, I have provided step by step instructions below!
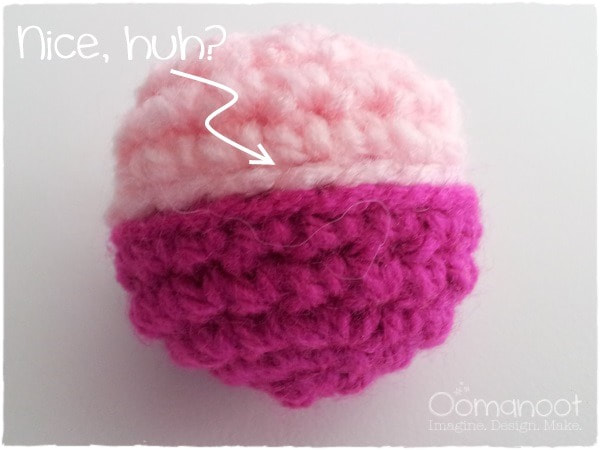
Once you have crocheted the amount needed inside the loop, then you made it to the fun part! Pull the tail to tighten the ring: Ahhhhhhhh, isn't that satisfying? It may look complicated but once you do it you will realize it is much easier than it looks. And soo worth it! 3. Use this color change methodI came across this blog post and I personally think this is the best way to change colors when you are working in rounds. It's actually really simple. Basically, after you attach your new color, the technique is to: 1. Slip stitch in the back loop only all the way around with the new color (doesn't count as a round). 2. Continue the next round as stated in the pattern, but in the back loops of the slip stitches. This creates a really nice border around the colors and looks super clean! 4. Symmetry symmetry symmetryWhen attaching limbs, eyes, ears, horns, or anything that comes in pairs, it is CRUCIAL to make sure that they are perfectly symmetrical. The human eye is very perceptive to symmetry (or lack there of) and I promise it will make a big difference in the overall look of your projects. I highly recommend counting stitches from the center and pinning everything in place before sewing. Give your work a good look from all angles before committing to the placement. I hope these tips will come in handy for anyone trying to up their amigurumi game. Feel free to leave a comment below with your experiences!!
Love, Nikki
17 Comments
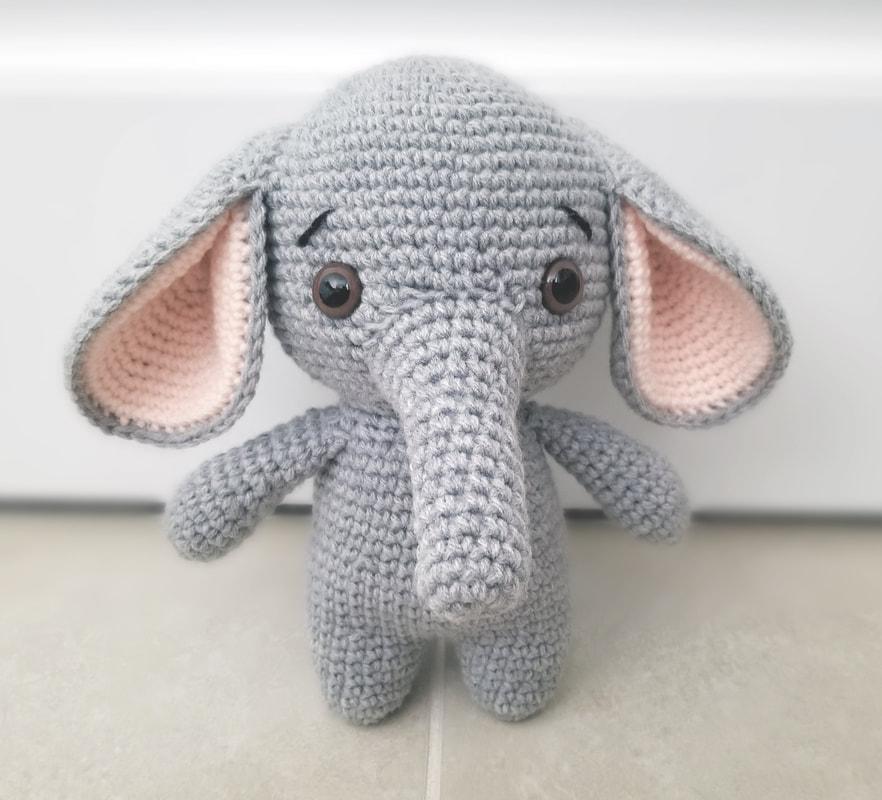
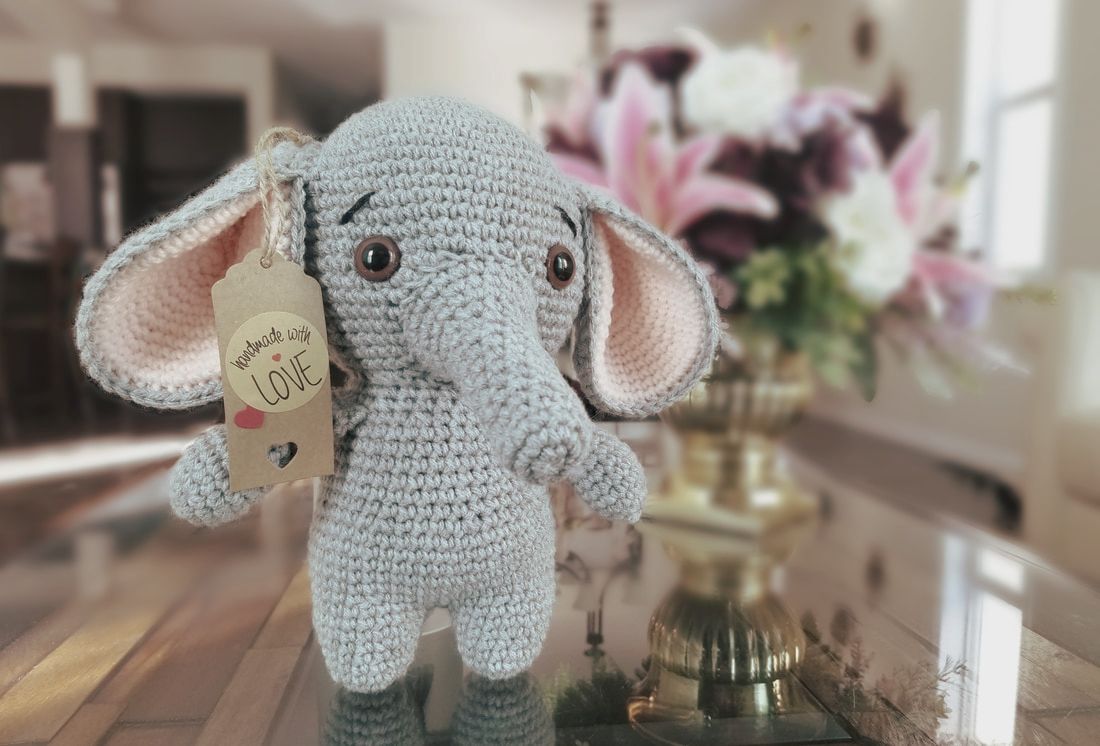
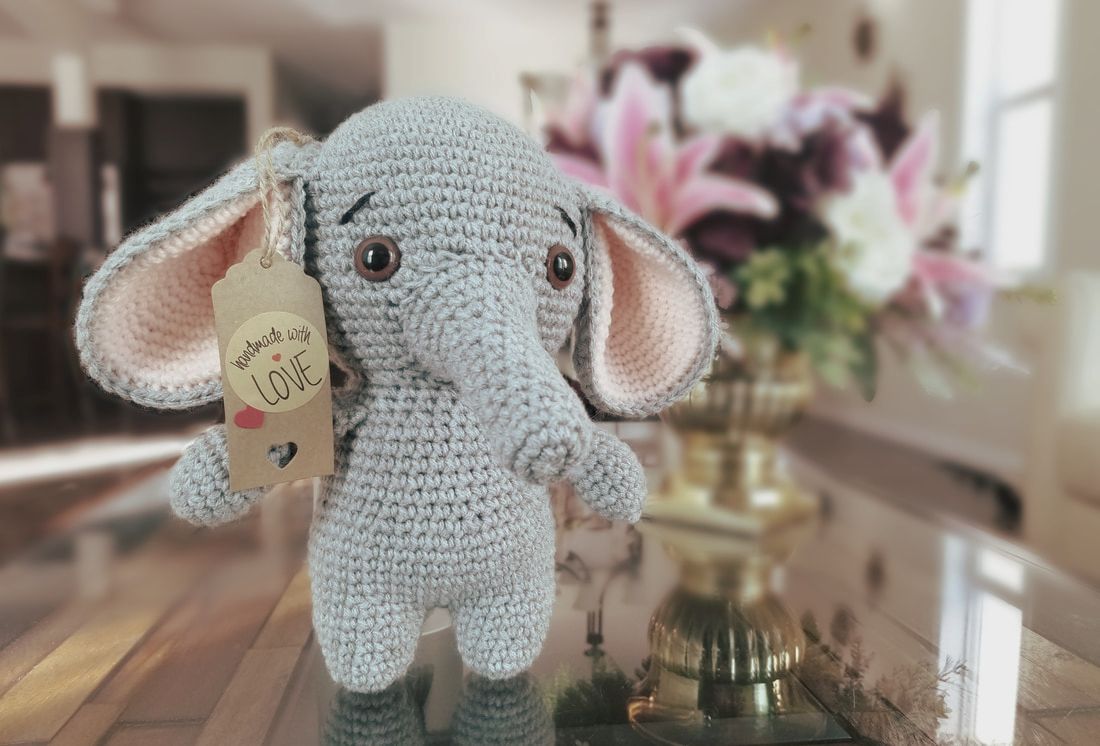 Ok so I remember endlessly scrolling through Pinterest (like one does), and I saw the cutest amigurumi crocheted elephant ever. I needed to make it. So I started searching for a pattern to buy but I couldn't find one anywhere! Instead of searching for a pattern any longer, I decided I would go off the picture to recreate it... and it turned out amazing!! Because I love it so much, I decided I would create a pattern so others could enjoy this wonderful little project. You will find the free pattern below. Enjoy :) What you will need
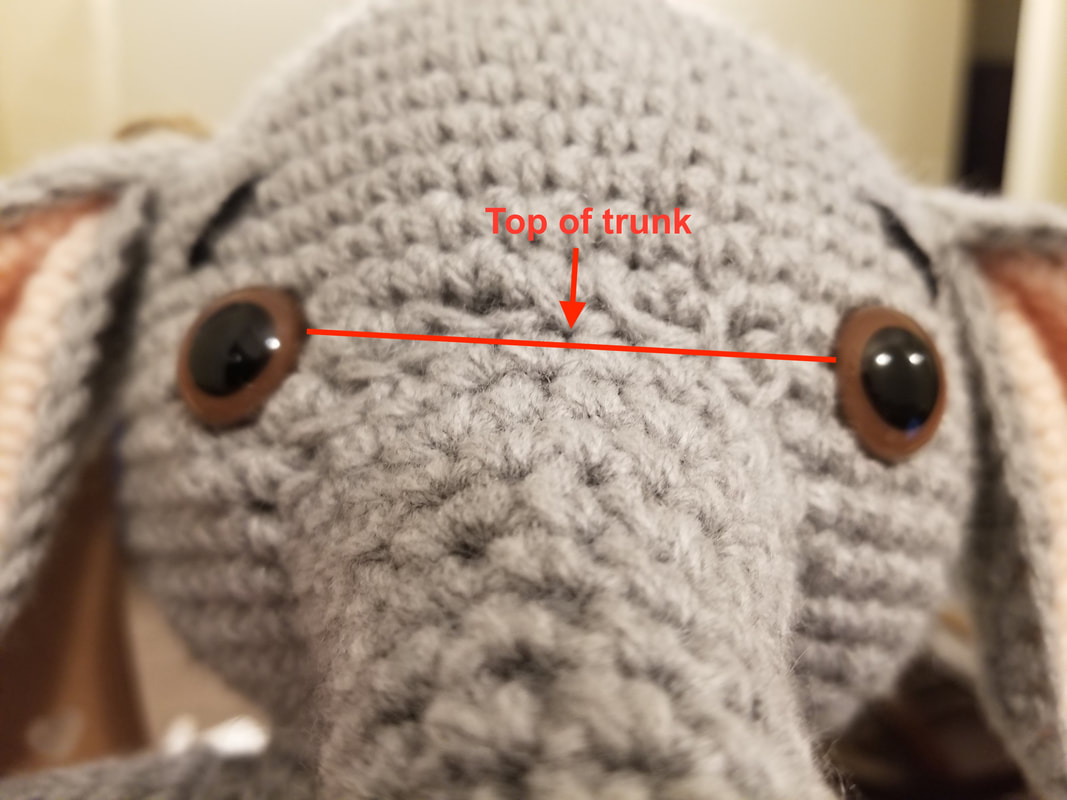
NotesUnless otherwise specified, all parts will be worked in continuous rounds. It is important to use your stitch markers at the end of each round so you don't lose your place! I always start all my rounds with a magic ring. You can watch a video about how to do that here. If you do not want to use a magic ring, you can chain one, then crochet the specified amount of stitches into that chain. I highly recommend using a magic ring because you can tighten the ring after you have done a few rows and it eliminates any gaps in your work. Make sure to always be working with the outside of the shape facing you while you crochet around. This side is the "right" side. In my amigurumi, I usually like to use the cross stitch single crochet. This is definitely not required but I find it gives a nicer look to the finished product. You can watch a video on how to do this stitch here. Here is a comparison of the two different stitches: AbbreviationsSC: Single Crochet, Inc: SC Increase (2 SC in same stitch), Dec: SC Decrease (if you do not know how to do this, watch this), [ ]: When you see this, you will be repeating the pattern inside the brackets, ( ): Total number of stitches for that round PATTERNHeadUsing the light grey yarn: 1: Start 6 SC in a magic ring 2: Inc x6 (12) 3: [SC, Inc] x6 (18) 4: [2SC, Inc] x6 (24) 5: [3SC, Inc] x6 (30) 6: [4SC, Inc] x6 (36) 7: [5SC, Inc] x6 (42) 8: [6SC, Inc] x6 (48) 9: [7SC, Inc] x6 (54) 10: SC in all (54) 11: [8CS, Inc] x6 (60) 12-21: SC in all (60) Insert safety eyes here between rows 18 and 19, 13 stitches apart from each other. 22: [8SC, Dec] x6 (54) 23: [7SC, Dec] x6 (48) 24: [6SC, Dec] x6 (42) 25: [5SC, Dec] x6 (36) 26: [4SC, Dec] x6 (30) 27: [3SC, Dec] x6 (24) 28: [2SC, Dec] x6 (18) Now, stuff the head with filling to your desired firmness. I recommend stuffing amigurumi fairly firm so they hold their shape better. 29: [SC, Dec] x6 (12) 30: Dec x6 (6) Now finish the head by sewing through the front loops of every stitch and pulling it tight. At this point I like to tie it in a tight knot because it is more secure and will be hidden when you attach the body. TrunkUsing the light grey yarn: 1: Start 6 SC in a magic ring (6) 2: Inc x6 (12) 3: [3SC, Inc] x3 (15) 4-12: SC in all (15) 13: [4SC, Inc] x3 (18) 14: [8SC, Inc] x2 (20) 15: [9SC, Inc] x2 (22) 16: [10SC, Inc] x2 (24) Fasten off with a slip stitch, and leave a long tail for sewing. Stuff the trunk with fiber fill now and sew the trunk between the eyes (obviously :P) so the very top of the trunk is vertically in the middle of the eyes (see diagram below). Shameless Plug...I also make custom dog tags on Etsy. If you are in the market for some, please check out my shop PersonalizePenguin! EarsMake 2 using light grey and 2 using light pink (total of 4) 1: Start 6 SC in a magic ring 2: Increase around x6 (12) 3: [Inc, SC] x 6 (18) 4: SC, [Inc, 2SC] x5, Inc, SC (24) 5: [Inc, 3SC] x6 (30) 6: 3SC, [Inc, 4SC] x5, Inc, SC (36) 7: [Inc, 5SC] x6 (42) 8: 4SC, [Inc, 6SC] x5, Inc, 2SC (48) 9: [Inc, 7SC] x6 (54) 10: 5SC, [Inc, 8SC] x5, Inc, 3SC (60) 11: [Inc, 9SC] x6 (66) 12: 3SC, [Inc, 10SC] x5, Inc, 7SC (72) For the grey circles: fasten off and leave a very long tail (approx. 4 ft) to sew the circles together. For the pink circles: fasten off and trim the yarn to a couple inches. You can tie a knot and leave the yarn hanging in this case as well because it can be tucked in between the ear circles when you sew them together. Now you are going to sew the light pink circle to the grey circle by using single crochets:
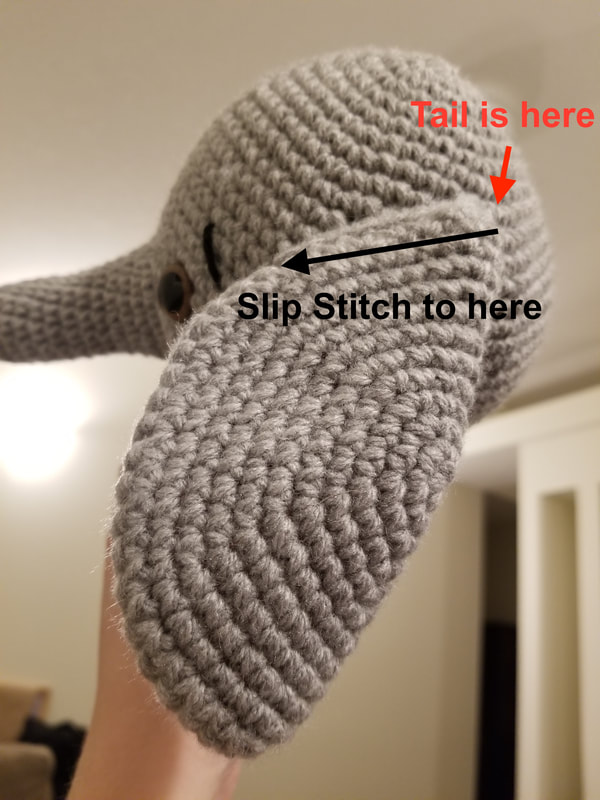
Body (and Legs)Start with the legs (Make 2): 1: Start 8 SC in a magic ring (8) 2: Inc x8 (16) 3-5: SC in all (16) 6: [3SC, Inc] x4 (20) Fasten off first leg with a slip stitch. Do not fasten off the second leg, you will continue crocheting to attach the legs together. Body: Continue from end of second leg: 1: 10SC, now pick up the other leg and continue to SC 20 stitches all the way around that leg. Now starting in the 11th stitch of the first leg, finish the last 10SC until you finish the round (40) 2: SC in all (40) 3: [4SC, Inc] x8 (48) 4-8: SC in all (48) 9: [4SC, Dec] x8 (40) 10-14: SC in all (40) 15: [3SC, Dec] x8 (32) 16: [4SC, Dec] x5, 2SC (27) 17: SC in all (27) Fasten off and leave a long tail for sewing. Stuff the body with fiber filling and sew onto the head. ArmsUsing the light grey yarn (Make 2): 1: Start 6SC in a magic ring 2: Inc x6 (12) 3: [3SC, Inc] x3 (15) 4-8: SC in all (15) 9: [3SC, Dec] x3 (12) 10-12: SC in all (12) 13: [4SC, Dec] x2 (10) 14: SC in all (10) Fasten off and leave a long tail for sewing. Stuff the arms with fiber filling and sew onto the body. I like to leave 1 row of stitches in the body between the top of the arm and the head so it looks like the elephant has a little neck and shoulders, and the arms aren't connected to the neck. Tail and EyebrowsYou're almost there! Now for the finishing touches: Tail Using the light grey yarn: 1: Chain 3 2: Cut yarn about 6inches and pull yarn through the last loop but do not tighten yet. 3: Cut a couple pieces of yarn (approx 6 inches) and pull both thos pieces of yarn through the lats loop of the chain (the one you haven't tightened yet) 4: Tighten the last loop now so the other bits of yarn are secured 5: Wrap the remaining yarn around the tail a few times then pull the yarn through the wrap. 6: Trim the yarn pieces (hair of the tail) to the desired length. Probably around half an inch 7: Sew tail onto the bum! Eyebrows Using black yarn or black embroidery thread: 1: Pick the placement for your eyebrows. I found that a couple rows above, and one row over (away from the nose) works well. Make sure to have them slanted the way I have them in the picture. It gives them a cute innocent look :) 2: Cut the yarn to about 6 inches and sew through the two points of the eyebrow. 3: Now you can tie the two ends of the eyebrow together. I just do a regular knot you would do when tying your shoes, twice. Make sure the knot is tight 4: Now you can trim the excess pieces of yarn (leave about a cm) and rotate the eyebrow thread so the knot goes inside the head! And that's it!! I would absolutely LOVE to hear about your experience with this pattern. If you have any questions feel free to leave a comment below! Love, Nikki |
AuthorNikki Moore - artist and blogger. Owner of Stuffed Hearts Crochet ArchivesCategories |


 RSS Feed
