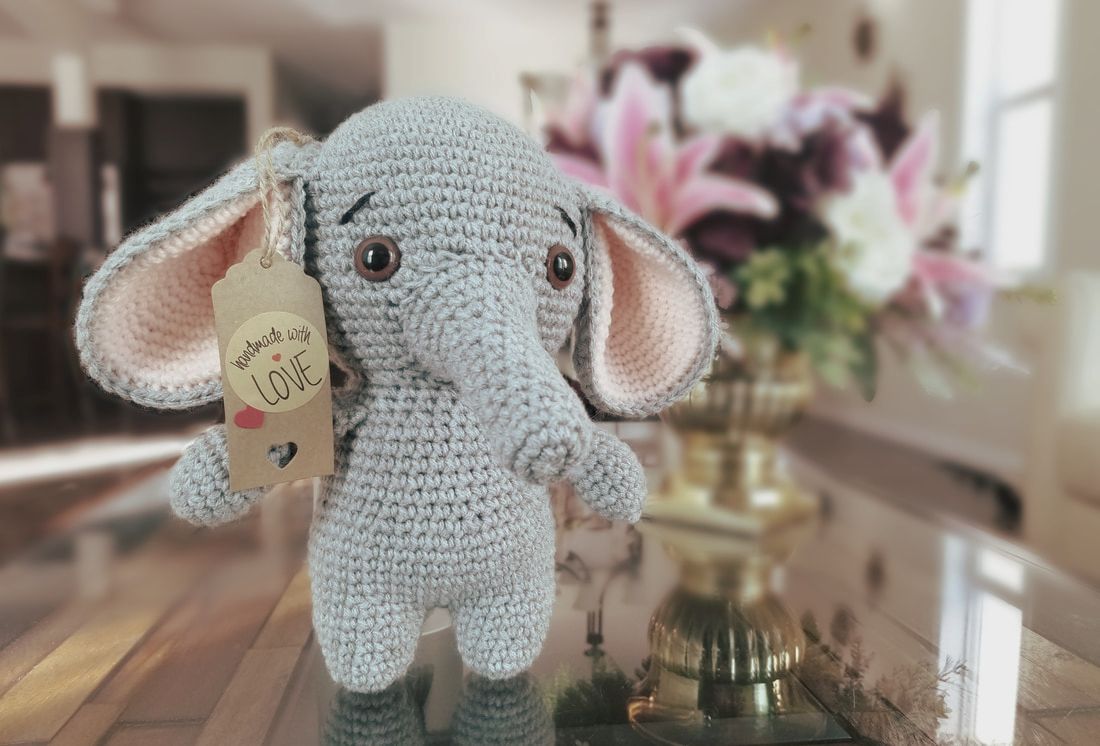
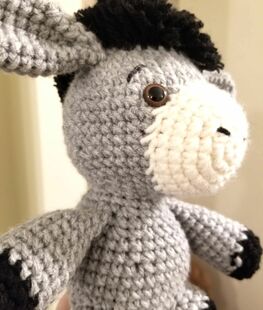
 Ok so I remember endlessly scrolling through Pinterest (like one does), and I saw the cutest amigurumi crocheted elephant ever. I needed to make it. So I started searching for a pattern to buy but I couldn't find one anywhere! Instead of searching for a pattern any longer, I decided I would go off the picture to recreate it... and it turned out amazing!! Because I love it so much, I decided I would create a pattern so others could enjoy this wonderful little project. You will find the free pattern below. Enjoy :) What you will need
NotesUnless otherwise specified, all parts will be worked in continuous rounds. It is important to use your stitch markers at the end of each round so you don't lose your place! I always start all my rounds with a magic ring. You can watch a video about how to do that here. If you do not want to use a magic ring, you can chain one, then crochet the specified amount of stitches into that chain. I highly recommend using a magic ring because you can tighten the ring after you have done a few rows and it eliminates any gaps in your work. Make sure to always be working with the outside of the shape facing you while you crochet around. This side is the "right" side. In my amigurumi, I usually like to use the cross stitch single crochet. This is definitely not required but I find it gives a nicer look to the finished product. You can watch a video on how to do this stitch here. Here is a comparison of the two different stitches:
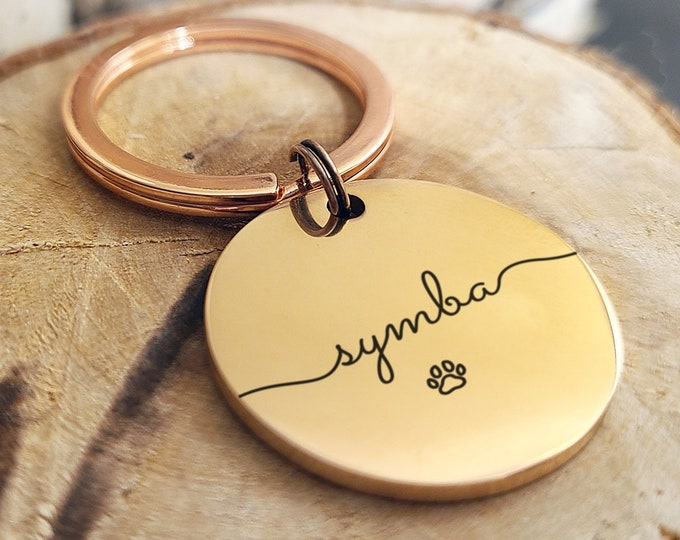
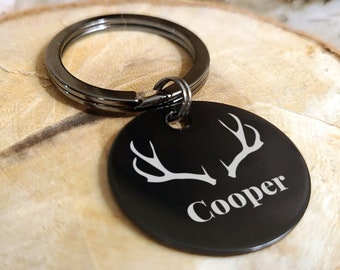
AbbreviationsSC: Single Crochet, Inc: SC Increase (2 SC in same stitch), Dec: SC Decrease (if you do not know how to do this, watch this), [ ]: When you see this, you will be repeating the pattern inside the brackets, ( ): Total number of stitches for that round PATTERNHeadUsing the light grey yarn: 1: Start 6 SC in a magic ring 2: Inc x6 (12) 3: [SC, Inc] x6 (18) 4: [2SC, Inc] x6 (24) 5: [3SC, Inc] x6 (30) 6: [4SC, Inc] x6 (36) 7: [5SC, Inc] x6 (42) 8: [6SC, Inc] x6 (48) 9: [7SC, Inc] x6 (54) 10: SC in all (54) 11: [8CS, Inc] x6 (60) 12-21: SC in all (60) Insert safety eyes here between rows 18 and 19, 13 stitches apart from each other. 22: [8SC, Dec] x6 (54) 23: [7SC, Dec] x6 (48) 24: [6SC, Dec] x6 (42) 25: [5SC, Dec] x6 (36) 26: [4SC, Dec] x6 (30) 27: [3SC, Dec] x6 (24) 28: [2SC, Dec] x6 (18) Now, stuff the head with filling to your desired firmness. I recommend stuffing amigurumi fairly firm so they hold their shape better. 29: [SC, Dec] x6 (12) 30: Dec x6 (6) Now finish the head by sewing through the front loops of every stitch and pulling it tight. At this point I like to tie it in a tight knot because it is more secure and will be hidden when you attach the body. TrunkUsing the light grey yarn: 1: Start 6 SC in a magic ring (6) 2: Inc x6 (12) 3: [3SC, Inc] x3 (15) 4-12: SC in all (15) 13: [4SC, Inc] x3 (18) 14: [8SC, Inc] x2 (20) 15: [9SC, Inc] x2 (22) 16: [10SC, Inc] x2 (24) Fasten off with a slip stitch, and leave a long tail for sewing. Stuff the trunk with fiber fill now and sew the trunk between the eyes (obviously :P) so the very top of the trunk is vertically in the middle of the eyes (see diagram below). 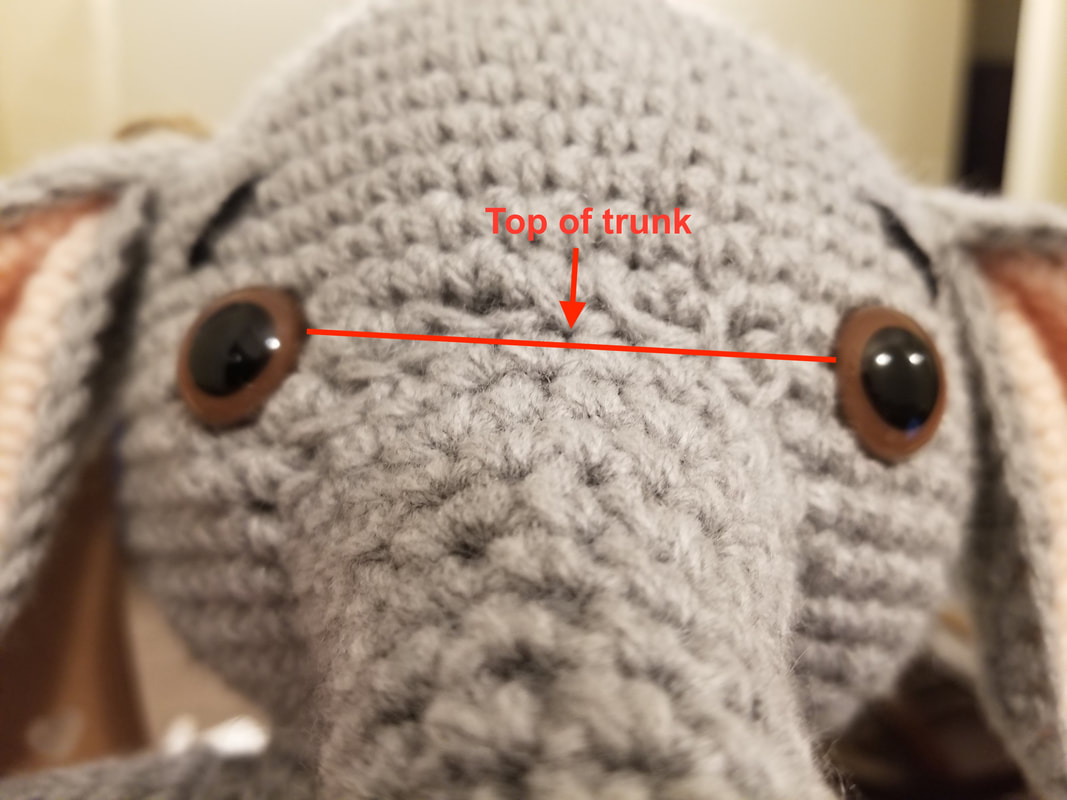 Shameless Plug...I also make custom dog tags on Etsy. If you are in the market for some, please check out my shop PersonalizePenguin!
EarsMake 2 using light grey and 2 using light pink (total of 4) 1: Start 6 SC in a magic ring 2: Increase around x6 (12) 3: [Inc, SC] x 6 (18) 4: SC, [Inc, 2SC] x5, Inc, SC (24) 5: [Inc, 3SC] x6 (30) 6: 3SC, [Inc, 4SC] x5, Inc, SC (36) 7: [Inc, 5SC] x6 (42) 8: 4SC, [Inc, 6SC] x5, Inc, 2SC (48) 9: [Inc, 7SC] x6 (54) 10: 5SC, [Inc, 8SC] x5, Inc, 3SC (60) 11: [Inc, 9SC] x6 (66) 12: 3SC, [Inc, 10SC] x5, Inc, 7SC (72) For the grey circles: fasten off and leave a very long tail (approx. 4 ft) to sew the circles together. For the pink circles: fasten off and trim the yarn to a couple inches. You can tie a knot and leave the yarn hanging in this case as well because it can be tucked in between the ear circles when you sew them together. Now you are going to sew the light pink circle to the grey circle by using single crochets:
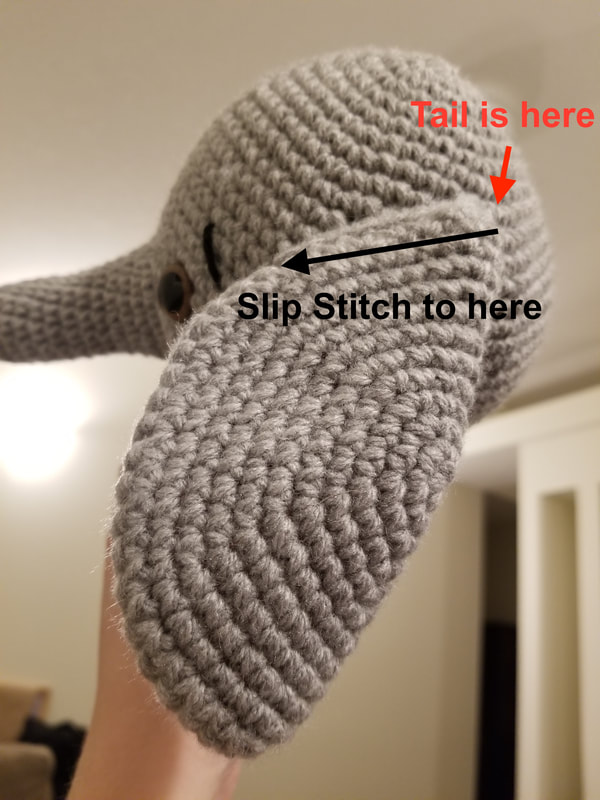
Body (and Legs)Start with the legs (Make 2): 1: Start 8 SC in a magic ring (8) 2: Inc x8 (16) 3-5: SC in all (16) 6: [3SC, Inc] x4 (20) Fasten off first leg with a slip stitch. Do not fasten off the second leg, you will continue crocheting to attach the legs together. Body: Continue from end of second leg: 1: 10SC, now pick up the other leg and continue to SC 20 stitches all the way around that leg. Now starting in the 11th stitch of the first leg, finish the last 10SC until you finish the round (40) 2: SC in all (40) 3: [4SC, Inc] x8 (48) 4-8: SC in all (48) 9: [4SC, Dec] x8 (40) 10-14: SC in all (40) 15: [3SC, Dec] x8 (32) 16: [4SC, Dec] x5, 2SC (27) 17: SC in all (27) Fasten off and leave a long tail for sewing. Stuff the body with fiber filling and sew onto the head. ArmsUsing the light grey yarn (Make 2): 1: Start 6SC in a magic ring 2: Inc x6 (12) 3: [3SC, Inc] x3 (15) 4-8: SC in all (15) 9: [3SC, Dec] x3 (12) 10-12: SC in all (12) 13: [4SC, Dec] x2 (10) 14: SC in all (10) Fasten off and leave a long tail for sewing. Stuff the arms with fiber filling and sew onto the body. I like to leave 1 row of stitches in the body between the top of the arm and the head so it looks like the elephant has a little neck and shoulders, and the arms aren't connected to the neck. Tail and EyebrowsYou're almost there! Now for the finishing touches: Tail Using the light grey yarn: 1: Chain 3 2: Cut yarn about 6inches and pull yarn through the last loop but do not tighten yet. 3: Cut a couple pieces of yarn (approx 6 inches) and pull both thos pieces of yarn through the lats loop of the chain (the one you haven't tightened yet) 4: Tighten the last loop now so the other bits of yarn are secured 5: Wrap the remaining yarn around the tail a few times then pull the yarn through the wrap. 6: Trim the yarn pieces (hair of the tail) to the desired length. Probably around half an inch 7: Sew tail onto the bum! Eyebrows Using black yarn or black embroidery thread: 1: Pick the placement for your eyebrows. I found that a couple rows above, and one row over (away from the nose) works well. Make sure to have them slanted the way I have them in the picture. It gives them a cute innocent look :) 2: Cut the yarn to about 6 inches and sew through the two points of the eyebrow. 3: Now you can tie the two ends of the eyebrow together. I just do a regular knot you would do when tying your shoes, twice. Make sure the knot is tight 4: Now you can trim the excess pieces of yarn (leave about a cm) and rotate the eyebrow thread so the knot goes inside the head!   And that's it!! I would absolutely LOVE to hear about your experience with this pattern. If you have any questions feel free to leave a comment below! Love, Nikki
39 Comments
Barb
5/27/2019 11:04:16 pm
Loved this pattern!
Nikki Moore
5/28/2019 09:26:53 am
Thank you so much Barb! Glad you enjoyed it :)
Sara
8/9/2019 05:38:56 pm
Hermoso! Gracias ! Voy a hacerlo!
Cida
10/12/2019 03:24:22 am
Obrigada lindo demais . Procurava muito Est e elefante. Muito obrigada viu
Alexia
10/16/2019 04:21:51 pm
Hi, I love it whats the size of the finished elephant??
Nikki Moore
10/16/2019 05:10:08 pm
Hi Alexia! It depends on the thickness of your yarn and how tight your stitches are but mine turned out to be about 11 inches tall. Hope that helps!
Angélica Gusciora Bom Fim
10/28/2019 07:16:27 am
Lindo, fiz o elefante, super lindo, gostaria de te marcar no Instagram, mais não estou te encontrando.
K.T. Lambert
4/10/2020 09:57:18 pm
I love it! Do you have a picture of the tail?
Juanita
5/10/2020 04:07:46 pm
This is so cute! I made this for my mom for mothers' day and she loved it!
Appu
5/29/2020 09:24:47 am
Hi !
Karina
6/2/2020 07:44:33 pm
I have just started with 4 ply yarn - gift for a baby. You pattern is so easy to follow - thank-you
Karina
7/3/2020 04:47:23 am
Many thanks for a lovely pattern. I have made Elton or either Eltonina, as I added a little pink scarf and flowers on her head.
Eva
7/28/2020 04:02:01 am
Hi, it's super cute and easy. I'm on the tail now, but could you please provide a picture if it? Thanks!
Teri Peterson
11/14/2020 12:04:18 pm
It came out adorable - thank you so much for the pattern!
Camila
2/11/2021 07:01:56 am
Hi, I have just done mine, It´s so cute! Thanks for sharing the pattern.
Lynanne
2/13/2021 09:42:16 am
Thank you so much for offering these adorable patterns for free. you are so talented!
Verónica
2/15/2021 08:03:17 am
How much yarn is it needed? :) 5/6/2021 09:23:25 pm
Do you make and sell your animals? I would really like if I could buy this elephant. If you do how much would the cost be?
Jennifer Barron
9/18/2021 09:31:45 pm
Can you PLEASE send a picture of the tail?
Dorothy Crowley
2/3/2022 06:57:35 pm
Really would like a picture of the tail. Not really sure how to do it.
Chris Hemsted
11/22/2022 06:26:38 am
Could you make a printable pattern please for a fee? I find it difficult to follow the pattern on my laptop. 12/10/2022 12:00:24 am
instagram beğeni satın al: https://takipcialdim.com/instagram-begeni-satin-al/ 12/10/2022 12:02:48 am
Garantili Tiktok takipçi satın al: https://takipcialdim.com/tiktok-takipci-satin-al/ 12/15/2022 06:53:11 pm
takipçi satın al ve sitemizi ziyaret et: https://takipcim.com.tr/
Brittany
1/30/2024 07:00:23 pm
So cute! Is this free pattern able to be used on physical products sold at craft fairs?
Batsheva Cohen
5/20/2024 03:36:13 am
I just finished making the elephant and it came out very cute. 5/25/2024 04:19:34 am
We are the most discreet in this due to our past experiences from the past 3 years of shipping worldwide. https://healthmartdrugsstore.com/ Leave a Reply. |
AuthorNikki Moore - artist and blogger. Owner of Stuffed Hearts Crochet ArchivesCategories |


 RSS Feed
